How Do You Program a Push Start Remote Step by Step
Programming a push start remote is easier than most drivers think. This step-by-step guide walks you through the entire process, from gathering your tools to testing the final setup. You will learn the exact methods for different vehicle brands and common mistakes to avoid along the way.
Have you ever stood in your driveway holding a brand-new key fob, wondering how to get it to work with your vehicle? Programming a push start remote might seem intimidating at first, but the process is actually much simpler than most people assume. Whether you just bought a replacement fob or added a second remote to your car, this guide will walk you through every step clearly and confidently.
Many drivers avoid programming their own remotes because they worry about messing something up. The truth is, modern vehicles are designed to make this process user-friendly. You do not need expensive tools or advanced technical knowledge. With the right approach and a few minutes of your time, you can have your new push start key fob working perfectly. Let us dive into the details.
Key Takeaways
- Programming is straightforward: Most vehicles follow a similar process using the ignition and key fob buttons.
- Check your owner’s manual first: It contains brand-specific instructions that save time and frustration.
- Battery health matters: A weak key fob battery causes programming failures and signal issues.
- Timing is critical: You must complete each step within the specified window to sync the remote successfully.
- Aftermarket options exist: Universal remotes work if OEM programming is not available or too costly.
- Professional help is always an option: A locksmith or dealer can handle programming if you get stuck.
📑 Table of Contents
- Understanding Your Push Start Remote
- What You Need Before Programming
- Step-by-Step Programming Guide
- Common Programming Mistakes to Avoid
- Troubleshooting Programming Issues
- When to Seek Professional Help
- Maintaining Your Push Start Remote
- Quick Tips for Successful Programming
- Frequently Asked Questions
- Conclusion
Understanding Your Push Start Remote
Before you start programming, it helps to understand what you are working with. A push start remote combines two functions into one compact device. It handles keyless entry and starts your engine with the push of a button inside the vehicle. These smart remotes communicate with your car through a radio frequency signal.
The remote contains a small circuit board and a battery that sends encrypted signals to your vehicle’s receiver. When the signal matches, the car recognizes the fob as authorized. This is why key fob programming requires a specific sequence, it is essentially teaching your car to trust a new device.
How Push Start Technology Works
Modern vehicles use a smart key system that relies on proximity detection. When your fob is inside the car, the system recognizes it and allows you to start the engine. The remote extends this functionality beyond the vehicle, letting you lock, unlock, and start your car from a distance.
The technology has evolved significantly over the past decade. Early remotes used simple fixed codes, but today’s remotes use rolling encryption codes that change every time you press a button. This makes your vehicle more secure against theft. Understanding this helps you appreciate why the programming process needs to be done correctly.
Types of Push Start Remotes
Not all remotes are the same. Here are the main types you might encounter:
- OEM factory remotes: These come directly from your vehicle manufacturer and match your car’s original specifications.
- Aftermarket remotes: These are universal remots sold by third-party brands and often cost less than OEM options.
- Remote start kits: These add remote starting capability to vehicles that did not come with it from the factory.
Each type requires a slightly different programming approach. Always identify which kind you have before beginning the process.
What You Need Before Programming
Gathering everything beforehand saves you from frustrating interruptions mid-process. Here is your checklist of items you need ready.
Essential Tools and Materials
- Your new push start remote or key fob
- A working key or existing programmed fob (if available)
- A fresh battery for the new fob (CR2032 is most common)
- Your vehicle owner’s manual
- A clean, flat workspace near your car
Do not skip the battery replacement step. A low battery is one of the most common reasons programming fails. Put the new battery in the fob before you begin. Also, keep your owner’s manual nearby because different brands have unique steps you will need to follow.
Where to Buy Replacement Remotes
If you are purchasing a new remote, you have several options. The dealership sells OEM remotes but at a premium price. Online retailers and auto parts stores offer more affordable alternatives. Aftermarket remotes work well for most vehicles, but always confirm compatibility before buying. Some universal remotes come pre-programmed, while others require you to complete the setup yourself.
Step-by-Step Programming Guide
This is the core of the process. While exact steps vary by vehicle brand, the general method follows a similar pattern across most makes and models. We will walk through the universal approach first, then cover brand-specific variations.
Universal Programming Method
Follow these steps carefully and complete each one within the time window specified. Most vehicles give you between 5 and 30 seconds per step.
- Step 1: Enter your vehicle and close all doors. Make sure no other key fobs are inside the car during programming.
- Step 2: Insert your key into the ignition or place your foot on the brake pedal, depending on your vehicle type.
- Step 3: Turn the ignition to the ON position (or press the push start button without pressing the brake). Do not start the engine.
- Step 4: Press and hold the lock button on your new remote for several seconds.
- Step 5: Turn the ignition back to OFF within the time window.
- Step 6: Release the lock button on the remote.
- Step 7: Repeat the cycle for any additional remotes you want to program.
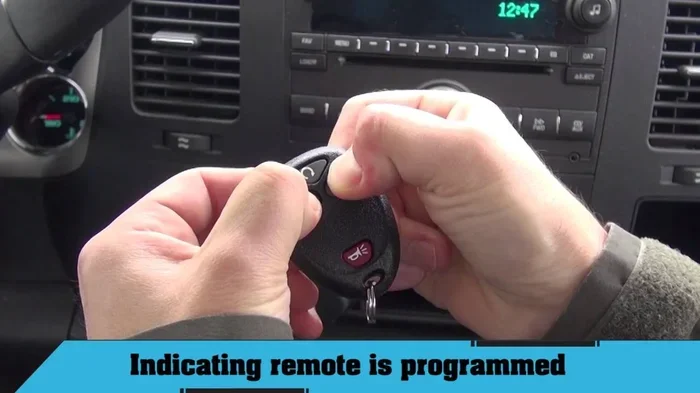
- Step 8: Test the remote by standing a few feet away and pressing the lock and unlock buttons.
That is the basic sequence. If your vehicle does not respond, do not panic. Move on to the brand-specific instructions below or try the troubleshooting tips at the end of this article.
Brand-Specific Programming Tips
Different manufacturers use slightly different methods. Here are some common variations:
- Ford vehicles: Typically require cycling the ignition between OFF and ON three times before the doors lock, confirming the programming mode is active.
- Toyota and Lexus: Often need you to hold the lock and unlock buttons on the remote simultaneously while turning the ignition.
- Chevrolet and GMC: Usually involve pressing the remote start button on the remote while the key is in the ignition ON position.
- Honda vehicles: May require pressing the remote button while the key is turned to the accessory position.
Always refer to your vehicle owner’s manual for the exact sequence. You can also search online for your specific make, model, and year to find a detailed programming guide.
Common Programming Mistakes to Avoid
Even experienced car owners make mistakes during the programming process. Knowing what to avoid saves you time and prevents frustration.
Skipping the Battery Check
This is the number one mistake people make. A weak or dead battery in your new remote means it cannot send a signal to your vehicle. Always install a fresh battery first. The key fob battery is usually a CR2032 coin cell that costs just a few dollars at any convenience store.
Taking Too Long Between Steps
Programming windows are tight. If you take too long turning the ignition or pressing buttons, the car exits programming mode and you have to start over. Practice the sequence a few times before you begin so you feel confident with the timing.
Programming Too Many Remotes at Once
Some vehicles limit how many remotes you can program simultaneously. If the process fails after adding the third remote, you may need to reprogram all of them. Start with one remote first, then add others individually.
Ignoring the Existing Remote
In most cases, you need at least one working remote to program a new one. If you have lost all remotes, you cannot use the DIY method. This is where holding the push start button in a specific sequence becomes important, and you should check whether your vehicle requires a special procedure. For detailed guidance on this topic, you can read our article on are you supposed to hold the push start button, which covers the proper handling and positioning of the start button during various vehicle operations.
Troubleshooting Programming Issues
Even when you follow every step correctly, things sometimes go wrong. Here are the most common issues and how to fix them.
The Remote Does Not Respond
If your new remote does not lock or unlock the doors, first check the battery. Then make sure you are within range of the vehicle during testing. Distance and interference from other electronic devices can block the signal. Try standing right next to the car and testing again.
The Car Does Not Enter Programming Mode
This usually means you missed a step or took too long between actions. Reset by turning the ignition off, waiting 10 seconds, and starting the sequence again. Double-check your vehicle-specific instructions because even small deviations cause the process to fail.
The Remote Works Once But Then Stops
This indicates a sync issue between the remote and the vehicle’s receiver. Reprogram the remote from scratch. If the problem persists, the remote itself may be defective. Contact the seller for a replacement or try a different remote model.
Interference From Other Devices
Other key fobs, smartphones, or electronic devices near your vehicle can sometimes interfere with programming. Remove all extra remotes and electronic devices from the car before you begin. This eliminates any chance of signal confusion.
When to Seek Professional Help
There is no shame in calling a professional if the DIY route does not work. Some situations make professional assistance the better choice.
You Have Lost All Remotes
If you do not have any working remote, you cannot program a new one using the standard method. A dealership or locksmith can use specialized diagnostic tools to program remotes from scratch. This typically costs more but guarantees results.
Your Vehicle Uses Advanced Security Systems
Luxury vehicles and newer models often have enhanced security features that require dealer-level equipment for programming. If your car has a vehicle security system with immobilizer technology, a professional may be your best option.
You Are Uncomfortable With the Process
That is perfectly fine. Many auto parts stores offer free programming services if you purchase the remote from them. Your local locksmith can also handle the job quickly and affordably. Spending a little extra money for peace of mind is always worth it.
Weight and Accessories Matter for Key Fobs
Some drivers attach heavy keychains or accessories to their remotes. A heavy keychain adds stress to the remote’s buttons and battery compartment. If your key fob feels unusually heavy or bulky, it might affect the buttons or signal strength. For perspective on how weight impacts vehicle components, check out our guide on what counts as heavy for a car to understand how added weight affects vehicle performance and accessories.
Maintaining Your Push Start Remote
Once you have successfully programmed your remote, a little maintenance goes a long way. Proper care keeps your remote working reliably for years.
Battery Replacement Schedule
Most key fob batteries last between one and two years. If you notice reduced range or sluggish button response, it is time for a replacement. Swapping the battery takes less than a minute and costs under five dollars. Keep a spare battery in your glove box so you are never caught off guard.
Protecting the Remote From Damage
Remotes are not waterproof. Keep them away from moisture, extreme heat, and direct sunlight. A small protective case or pouch prevents drops and scratches. If your remote gets wet, remove the battery immediately and let it dry completely before reinserting.
Regular Signal Testing
Once a month, test all your remotes from different distances. This helps you catch weak batteries or developing issues early. If one remote consistently underperforms, replace the battery before it dies completely at an inconvenient moment.
Mileage and Remote Performance
For diesel vehicle owners, high mileage can sometimes correlate with electronic wear over time. If you drive a diesel and notice remote issues after many years of use, it may be worth checking overall vehicle electronics health. Learn more about what mileage levels mean for diesel engines in our article on what constitutes high mileage for a diesel engine and how it affects vehicle systems.
Quick Tips for Successful Programming
- Always start with a fresh battery in the new remote.
- Work in a quiet area away from other electronic devices.
- Follow your vehicle-specific instructions exactly.
- Complete each step within the time window the car allows.
- Test the remote immediately after programming while you are still near the vehicle.
- Keep your old remote until you confirm the new one works perfectly.
- Write down the steps that worked for your vehicle so you do not forget.
Frequently Asked Questions
Can I program a push start remote without the owner’s manual?
Yes, you can. Many vehicle brands follow a universal programming sequence that works across models. You can also find step-by-step instructions online by searching for your specific make, model, and year. The owner’s manual simply makes the process faster and more accurate.
How long does it take to program a push start remote?
Most remotes take between 5 and 15 minutes to program. The actual process is quick, but if you need to program multiple remotes or encounter issues, it may take longer. Having everything ready beforehand keeps the process smooth and efficient.
Can I program a remote myself or do I need a professional?
In most cases, you can program the remote yourself using the steps in this guide. Dealerships and locksmiths are available if you prefer professional assistance or if your vehicle has advanced security requirements that prevent DIY programming.
Why does my new remote not work after programming?
The most common reasons are a weak battery, missed programming steps, or timing issues between steps. Try reprogramming the remote from scratch, make sure the battery is fresh, and follow the steps carefully within the required time windows.
How much does it cost to program a push start remote?
DIY programming costs nothing beyond the price of the remote and battery. Professional programming at a dealership typically ranges from 50 to 200 dollars depending on your vehicle. Locksmiths often charge less than dealerships for the same service.
Can I use a universal remote with my push start system?
Some universal remotes are compatible with push start systems, but compatibility varies widely. Check the product specifications carefully before purchasing. Universal remotes often offer basic functions like lock and unlock but may not support all features of your original OEM remote.
Conclusion
Programming a push start remote is a skill every car owner should have in their toolkit. It saves money, builds confidence, and gives you independence from service centers for simple tasks. The process is straightforward once you understand the basic steps and gather the right tools beforehand.
Start by checking your vehicle’s specific requirements. Install a fresh battery in the new remote. Follow the programming sequence carefully and complete each step within the allowed time window. If you hit a snag, the troubleshooting tips above will help you get back on track.
Remember, there is no shame in calling a professional if you need help. The goal is to get your remote working and your vehicle running smoothly. With the knowledge you have gained from this guide, you are well equipped to handle the job yourself or make informed decisions when seeking assistance. Take your time, stay patient, and enjoy the convenience of a freshly programmed push start remote that works exactly the way it should.