Replacing Antique Auto Glass: What You Need to Know
Replacing antique auto glass is a critical part of keeping your classic car safe and road-ready. Whether you own a vintage sedan or a classic coupe, the right glass makes all the difference in appearance and protection. This guide covers everything from glass types and costs to step-by-step installation tips. You will learn how to find the perfect fit, avoid common mistakes, and budget wisely for your project.
Replacing antique auto glass is not like swapping out a modern car window. Vintage vehicles have unique shapes, materials, and safety standards that demand special care. If you are restoring a classic car, you know that every detail matters, and the windows are no exception.
Whether you are working on a 1930s sedan or a 1960s coupe, the right glass can transform the entire look and feel of your vehicle. But finding the correct glass, removing the old pieces safely, and installing new windows properly takes knowledge and patience. This guide walks you through everything you need to know.
We will cover glass types, costs, step-by-step installation, common mistakes, and expert tips that save time and money. By the end, you will feel confident tackling your next antique auto glass replacement project.
Key Takeaways
- Use the right glass type: vintage cars often need crown glass or laminated glass, not modern tempered glass.
- OEM and aftermarket options exist: choose based on your budget, authenticity needs, and safety requirements.
- Follow a careful removal process: old glass can be fragile, so safety comes first during extraction.
- Budget $200 to $1,500+ per window: costs vary based on glass type, car model, and whether you go custom.
- Sealing and weatherproofing matter: a proper gasket or sealant prevents leaks and wind noise.
- Avoid common mistakes: rushing the job, using wrong adhesives, and skipping safety steps can cause damage or injury.
📑 Table of Contents
Why Antique Auto Glass Needs Special Attention
Classic cars are not like modern vehicles. The glass used in older automobiles was made differently, and it behaves differently today. Understanding why antique auto glass requires special care is the first step toward a successful restoration.
The Unique Challenges of Vintage Windows
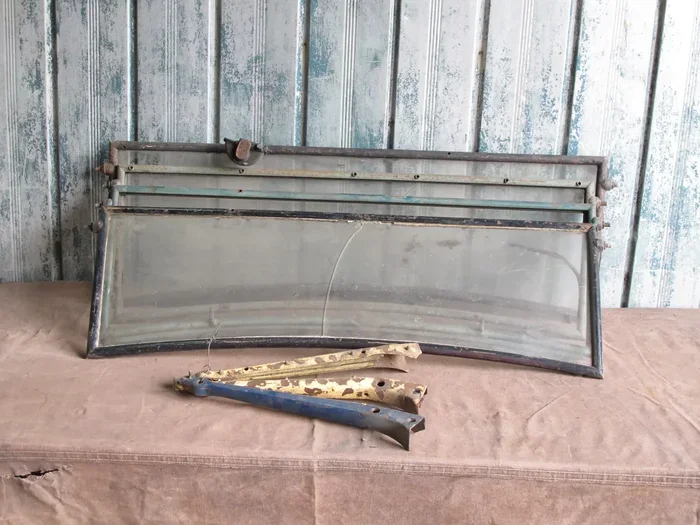
Many antique cars used curved glass that is hard to find today. Manufacturers in the early 1900s did not mass-produce flat safety glass the way they do now. Instead, they used crown glass or plate glass, which has a slightly different thickness and clarity than modern automotive glass.
Another challenge is the rubber gaskets and metal frames. Over decades, these materials crack, shrink, and harden. When you remove old glass, the frame may need repair or replacement before the new piece fits correctly. This adds time and complexity to the project.
Weatherproofing is also a big concern. Vintage cars were not designed with modern seals and adhesives. A replacement window must fit snugly to prevent water leaks, wind noise, and dust from entering the cabin. Getting this right requires attention to detail and the right materials.
Safety Standards Then vs. Now
Safety standards for auto glass have changed dramatically over the decades. Early cars did not require laminated or tempered glass. Some vintage vehicles even used plain plate glass, which shatters into sharp, dangerous shards.
Today, federal safety regulations require auto glass to meet specific standards. When you replace antique auto glass, you have a choice. You can use reproduction glass that mimics the original look while meeting modern safety standards. Or you can use authentic period-correct glass, which may not meet current safety requirements.
For daily driving or show cars that carry passengers, modern safety glass is the smarter option. For display-only restorations, authentic glass may be more appropriate. Understanding this difference helps you make the best decision for your project.
Types of Glass Used in Antique Cars
Not all glass is the same, especially when it comes to classic cars. Knowing the different types helps you choose the right replacement for your vehicle.
Crown Glass and Plate Glass
Crown glass was the most common type used in early automobiles. It is made by spinning a glass disk, which gives it a slightly uneven surface and subtle distortion. Many car enthusiasts love this look because it feels authentic to the era.
Plate glass is another older type. It is ground and polished for a flatter surface than crown glass. However, it is still thicker and heavier than modern automotive glass. Both crown and plate glass are popular choices for collectors who want a true period-correct appearance.
Tempered vs. Laminated Glass
Tempered glass is heated and then rapidly cooled to make it stronger. When it breaks, it shatters into small, less dangerous pieces. Most modern cars use tempered glass for side and rear windows.
Laminated glass consists of two glass layers with a plastic film in between. It is the standard for modern windshields because it holds together when shattered. For antique cars, laminated glass offers better safety without sacrificing the classic look.
When choosing between these options, consider how you use your car. If you drive it regularly, laminated or tempered glass is the safer choice. If it sits in a garage and only sees the road at car shows, crown glass may be the right fit.
| Glass Type | Best For | Safety Rating | Authenticity |
|---|---|---|---|
| Crown Glass | Display cars, shows | Low | High |
| Plate Glass | Restoration purists | Low | Very High |
| Tempered Glass | Daily driving | High | Medium |
| Laminated Glass | Daily driving, windshields | Very High | Medium |
| OEM Reproduction | All uses | High | High |
Step-by-Step Process for Replacing Antique Auto Glass
Replacing antique auto glass is a rewarding but careful process. Each step matters, and rushing through the job can lead to leaks, poor fit, or even injury. Here is a detailed walkthrough of the process.
Removing Old Glass Safely
Start by putting on heavy gloves and safety glasses. Old glass can be fragile and may break unexpectedly during removal. Place a drop cloth under the window to catch any shards.
Next, remove any trim, moldings, or weather stripping around the window. Use a plastic pry tool to avoid scratching the paint. If the glass is held in place by a rubber gasket, gently work it free. Do not force the glass, as it can crack or shatter.
For stuck glass, a thin fishing line or specialized glass removal tool can help. Slide the line between the glass and the frame to cut through old adhesive or gasket material. Work slowly and patiently. This step sets the foundation for a clean installation.
Preparing the Frame and Gasket
Once the old glass is out, inspect the frame carefully. Look for rust, cracks, or damage. Any rust should be treated with a rust converter or removed by sanding. A damaged frame can cause the new glass to fit poorly or leak.
Clean the frame thoroughly. Remove any old adhesive, gasket material, or debris. If you are installing a new rubber gasket, make sure it is the correct size and shape for your vehicle. A gasket that is too tight or too loose will cause problems down the road.
Some restoration experts recommend applying a thin layer of silicone lubricant to the gasket before installation. This makes it easier to seat the glass and creates a better seal. Take your time with this step, as proper preparation is the key to a leak-free finish.
Installing New Glass
Place the new glass into the frame carefully. If you are using a gasket, press the glass evenly around the edges. Make sure it sits flush and does not bow or flex.
For adhesive-based installations, apply the recommended adhesive in a steady, even bead. Follow the manufacturer’s instructions for curing time. Do not drive the car or roll down the window until the adhesive has fully set.
Once the glass is in place, reinstall all trim, moldings, and weather stripping. Check for any gaps or uneven spots. A final inspection for leaks can be done by spraying water around the edges and checking the interior for moisture.
Quick Tip: Always keep a small piece of cardboard or foam on the dashboard when working with glass. This protects your interior from accidental scratches or chips.
Finding the Right Glass for Your Classic Car
Finding the correct glass for an antique vehicle can be one of the trickiest parts of the project. The good news is that there are more options available today than ever before.
OEM vs. Aftermarket Glass
OEM stands for Original Equipment Manufacturer. OEM glass is made by the same company that supplied the original factory glass. It matches the exact specifications, curvature, and thickness of the original piece. For purists and serious collectors, OEM glass is the gold standard.
Aftermarket glass is produced by third-party manufacturers. It is often more affordable and easier to find. Many aftermarket pieces meet modern safety standards and look nearly identical to the original. The main trade-off is that the fit or clarity may not be perfect in every case.
Custom vs. Reproduction Glass
For rare or one-of-a-kind vehicles, custom glass may be your only option. Custom glass is made to order, often using original blueprints or templates. It is more expensive but offers the best fit and authenticity.
Reproduction glass is a more budget-friendly alternative. Companies specialize in recreating vintage glass using modern manufacturing techniques. The result looks and feels close to the original, but at a fraction of the cost of a custom piece.
Expert Insight: When shopping for antique auto glass, always ask the supplier about the glass type, thickness, and curvature. A reputable dealer will provide detailed specifications and can help you match the right piece to your vehicle.
Costs and Budgeting for Antique Auto Glass Replacement
Budgeting for antique auto glass replacement requires realistic expectations. Costs can vary widely based on several factors, and understanding them helps you plan effectively.
What Affects the Price
The type of glass is the biggest cost factor. Crown glass and custom pieces cost significantly more than standard reproduction glass. The size and shape of the window also matter. Curved windshield glass for a classic car costs more than a simple side window.
Labor costs are another consideration. If you hire a professional, expect to pay between $150 and $500 per window for installation. DIY installation saves money but requires the right tools and patience. Shipping costs for specialty glass can also add up, especially for custom or international orders.
Quick Tips to Save Money
- Buy in off-season: Glass suppliers often offer discounts during slower months.
- Join classic car forums: Other enthusiasts may know where to find deals or used NOS (New Old Stock) glass.
- Compare multiple suppliers: Prices can vary by 30% or more between vendors.
- Do the prep work yourself: Removing old glass and prepping the frame saves labor costs.
- Consider reproduction glass: It offers great quality at a lower price than OEM or custom options.
Common Mistakes to Avoid:
- Using modern caulk or glue not designed for auto glass. This can damage the frame and fail to seal properly.
- Skipping the inspection of the window channel or frame. Hidden rust or damage leads to leaks and poor fit.
- Forcing the glass into place. This can crack the glass or damage the gasket.
- Not allowing enough curing time for adhesives. Driving too soon can cause the glass to shift or leak.
- Buying glass without checking the curvature and thickness. An incorrect fit ruins the look and function.
Final Thoughts on Replacing Antique Auto Glass
Replacing antique auto glass is one of the most satisfying parts of a classic car restoration. When you see that new window sitting perfectly in the frame, with a clean seal and no leaks, it feels like a real accomplishment.
The key is to take your time, choose the right glass for your needs, and follow proper installation steps. Whether you are a seasoned restorer or a beginner, the tips and guidance in this article will help you navigate the process with confidence.
Remember, every classic car tells a story. By replacing its glass with care and attention, you are preserving that story for years to come. So roll up your sleeves, gather your tools, and enjoy the journey of bringing your vintage vehicle back to life.
Frequently Asked Questions
Can I use modern auto glass in an antique car?
Yes, you can use modern tempered or laminated glass for safety and durability. However, it may not match the original curvature and thickness of vintage vehicles. For show cars, reproduction or OEM glass is often preferred. For daily drivers, modern glass is a practical and safe choice.
How long does it take to replace a single antique car window?
A DIY replacement typically takes two to four hours per window, depending on the model and your experience level. Professional installation usually takes one to two hours per window. Factor in additional time for frame repair, gasket preparation, and adhesive curing.
What is the average cost to replace antique auto glass?
Costs range from $200 for a simple side window to $1,500 or more for a custom curved windshield. OEM and custom glass cost more than reproduction or aftermarket options. Labor costs vary by region and installer expertise.
Do I need special tools for replacing antique car glass?
Basic tools like gloves, safety glasses, a plastic pry tool, and a utility knife are essential. For adhesive-based installations, you will need the recommended adhesive and a caulking gun. A rubber gasket installation may only require a trim removal tool and lubricant.
Is it safe to drive with newly replaced antique auto glass?
Wait until the adhesive or gasket is fully cured before driving. Most adhesives require 24 to 48 hours to set completely. Driving too soon can cause the glass to shift, leak, or even pop out. Always follow the manufacturer’s curing instructions.
Where can I find replacement glass for rare antique cars?
Specialty suppliers like Classic Auto Glass, Eckler’s, and Antique Auto Glass Parts are great starting points. Online forums and classic car clubs often have leads on NOS or custom glass. You can also search for local auto glass shops that specialize in vintage vehicles.
=== CONCLUSION ===
Replacing antique auto glass does not have to be overwhelming. With the right knowledge, tools, and glass type, you can restore your classic car’s windows safely and beautifully. Remember to choose between crown glass, tempered glass, or laminated glass based on your needs. Budget wisely, avoid common mistakes, and take your time with each step.
Whether your goal is a show-worthy restoration or a reliable daily driver, the right glass makes all the difference. Trust the process, learn from each project, and enjoy the satisfaction of bringing your vintage vehicle back to its former glory. Happy restoring!