How Do You Remove Corner Guards Without Any Damage Today
Removing corner guards from your vehicle is easier than you think when you use the right method. Whether you have adhesive-backed plastic guards or bolt-on metal protectors, this guide walks you through every step safely. You will learn which tools work best, how to avoid paint damage, and what to do about sticky residue. Follow our approach and keep your car looking factory-fresh.
Corner guards protect the most vulnerable spots on your vehicle. They take the brunt of parking lot dings, curbs, and minor bumps. Over time, though, these guards fade, crack, or simply look outdated. When that happens, you need to know how do you remove corner guards without leaving a trace behind.
The good news is that this job does not require a mechanic or a dealership visit. With the right tools and a little patience, you can pull off corner guards at home. Whether you drive a sedan, SUV, or truck, the process follows similar steps. This guide gives you everything you need to know. We cover every tool, every technique, and every pitfall to avoid.
Let us be upfront about one thing. Removing corner guards can feel intimidating. The last thing anyone wants is to peel off paint along with the guard. That is exactly why we built this guide. You will learn how to work with your vehicle, not against it. By the end, you will feel confident tackling this project on your own.
Key Takeaways
- Use heat carefully: A hair dryer or heat gun softens adhesive and makes removal smooth and safe.
- Work slowly: Rushing the process is the number one cause of paint damage and broken clips.
- Clean residue properly: Goo Gone or rubbing alcohol removes leftover adhesive without harming your finish.
- Know your guard type: Adhesive guards need a different approach than bolt-on or clip-in models.
- Protect the paint: Always use a plastic trim tool or microfiber cloth between your tool and the car surface.
- Replace if needed: After removal, you can install new guards or leave the area bare for a clean look.
📑 Table of Contents
- Why People Remove Corner Guards
- Tools and Materials You Will Need
- Step-by-Step Guide to Removing Corner Guards
- Dealing with Adhesive Residue After Removal
- Common Mistakes People Make When Removing Corner Guards
- When to Call a Professional
- After Removal: What to Do Next
- Final Thoughts on Removing Corner Guards
Why People Remove Corner Guards
Corner guards serve a real purpose. They shield the edges of your fenders, doors, and bumpers from impact. But there are plenty of reasons car owners decide to take them off. Understanding your reason helps you choose the best removal method.
Worn-Out or Damaged Guards
After years on the road, corner guards collect dirt, scratches, and UV damage. They turn yellow, crack, or peel away from the surface. A damaged guard no longer protects your car. Worse, it can actually look worse than having no guard at all. In these cases, removal is the smart move.
Restyling or Customizing Your Vehicle
Many car enthusiasts prefer a clean, minimalist look. Stock corner guards can clash with aftermarket body kits or custom paint jobs. Removing them gives the vehicle a sleeker appearance. This is especially common among owners of modern cars that come with aggressive factory styling.
Selling or Trade-In Preparation
First impressions matter when selling a car. Worn or mismatched corner guards can lower perceived value. Removing them before a listing shows the vehicle in its best light. Buyers often pay more for a clean, unmodified exterior.
Replacing with New Guards
Sometimes removal is just the first step. You might want to swap old guards for new ones. Maybe you are upgrading to a higher-quality material or switching from plastic to chrome. Either way, taking off the old set is the starting point.
Tools and Materials You Will Need
Gathering your supplies before you start makes the whole process smoother. You do not need anything exotic. Most of these items are already in your garage or easy to find at any auto parts store.
Here is your checklist for removing corner guards safely:
- Hair dryer or heat gun — This is the most important tool. Heat softens the adhesive bond without scraping.
- Plastic trim removal tool — It slides under the guard without scratching your paint.
- Dental floss or fishing line — Great for sawing through stubborn adhesive layers.
- Goo Gone or rubbing alcohol — These dissolve adhesive residue safely.
- Microfiber cloths — You need these for wiping and buffing throughout the process.
- Plastic putty knife — Useful for gently prying up edges once the adhesive loosens.
- Screwdriver set — Some corner guards use small screws or bolts.
- Masking tape — Protects surrounding paint during prying.
- Car wash soap and water — Clean the area before and after removal.
Pro tip: Never use a metal blade or razor near your car’s paint. Even a thin screwdriver can leave deep scratches. Always default to plastic tools first.
Step-by-Step Guide to Removing Corner Guards
Now we get to the heart of the matter. Follow these steps in order for the cleanest possible removal. Whether you have front corner guards, rear corner guards, or side-mounted protectors, the process stays the same.
Step 1: Clean the Guard and Surrounding Area
Start with a thorough wash. Dirt and grit act like sandpaper when you pry against them. Use car wash soap and a soft microfiber cloth. Pay special attention to the edges where the guard meets the body panel. Dry everything completely before moving on.
Step 2: Apply Heat to Soften the Adhesive
Plug in your hair dryer or set your heat gun to a low setting. Hold it about six inches from the guard surface. Move it in slow, even passes across the entire guard. You want the adhesive to become soft and pliable. This usually takes about two to three minutes per section.
Be careful not to overheat. Too much heat can damage the paint or warp the plastic guard itself. Keep the temperature moderate and the movement steady. If the guard starts to feel warm to the touch but not hot, you are in the right zone.
Step 3: Slide a Plastic Tool Under the Edge
Once the adhesive feels warm, take your plastic trim tool. Slide it gently under one corner of the guard. Work slowly. Let the heat do the hard work for you. If the guard resists, apply more heat and wait another thirty seconds.
Never force the tool under the guard. That is how paint chips happen. Patience is your best friend here. A little extra time at this stage saves you from expensive paint repairs later.
Step 4: Work Along the Edge Gradually
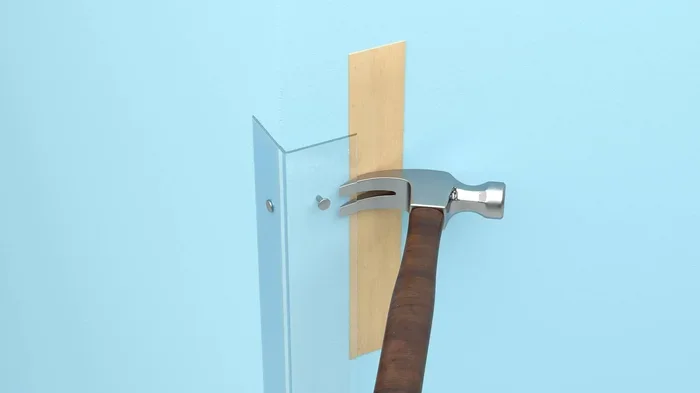
After you get the first edge lifted, continue sliding the tool along the perimeter. Keep applying heat as you go. The adhesive will release in sections. Pull the guard away from the body at a low angle. This reduces the stress on both the paint and the guard material.
If the guard has any screws or bolts, remove those first. They make the removal process much easier. You can spot them by looking closely at the guard edges or underneath the guard itself.
Step 5: Remove the Guard Completely
Once you have worked all the way around, the guard should come off freely. Set it aside. Inspect the surface underneath for any remaining adhesive or leftover clips. You are now ready for the cleaning phase.
Dealing with Adhesive Residue After Removal
This is where many people give up. Even with careful removal, some adhesive will likely stay behind on the paint. Do not panic. Residue is completely normal and very manageable.
Method One: Heat and Peel
Apply heat again to the sticky area. Use your fingers or a plastic tool to gently roll the softened adhesive off the surface. This works well for thin, leftover adhesive layers. It is the gentlest method and should always be your first attempt.
Method Two: Adhesive Remover
Spray a small amount of Goo Gone or rubbing alcohol onto a microfiber cloth. Let it sit on the residue for about one minute. Then wipe gently in circular motions. The adhesive will dissolve and lift away. Repeat as needed until the surface is completely clean.
Method Three: Clay Bar Treatment
For really stubborn spots, a detailing clay bar works wonders. Use it with a clay lubricant on the affected area. The clay grabs the residue and pulls it off without scratching. This leaves the paint feeling smooth and looking brand new.
After removing all residue, wash the area one more time. Then apply a coat of wax to protect the paint. This restores the clear coat and adds a layer of defense against future damage.
Quick Tips for Clean Removal
- Always work in a shaded area. Direct sunlight heats the car unevenly and can warp plastic parts.
- Keep a bowl of warm water nearby. Dipping your tools in warm water helps with stubborn spots.
- Take before and after photos. This helps you spot any missed residue or damage.
- Wear gloves. Adhesive can be messy and some remover chemicals irritate the skin.
- Go slow. Speed is the enemy of a clean corner guard removal.
Common Mistakes People Make When Removing Corner Guards
Learning what not to do is just as important as knowing the right steps. These are the mistakes that cause the most damage during corner guard removal.
Using Metal Tools on Paint
This is the number one mistake. A flathead screwdriver or metal pry bar will scratch your paint every time. Even a thin blade leaves marks that are hard to fix. Stick to plastic trim tools and your fingers whenever possible.
Skipping the Heat Step
Some people try to pull the guard off cold. This almost always ends badly. Cold adhesive is brittle and does not release cleanly. It snaps and leaves behind large chunks of residue. Always apply heat first.
Pulling Too Fast
Yanking the guard off quickly puts enormous stress on the adhesive bond. It can tear the guard, leaving pieces stuck to the car. It can also pull up paint along with the adhesive. Slow and steady wins this race every single time.
Ignoring Screws and Fasteners
Many corner guards attach with hidden screws or clips. If you try to pry them off without removing these first, you risk breaking the guard and damaging the body panel. Always inspect for fasteners before you start prying.
Using Harsh Chemicals
Acetone and strong solvents can damage car paint and clear coat. They strip away the protective layer and leave the paint looking dull. Stick to automotive-safe adhesive removers like Goo Gone or isopropyl alcohol.
Not Protecting Surrounding Areas
When you pry near other body panels or trim pieces, you can accidentally scratch them. Apply masking tape to nearby surfaces before you start working. This simple step prevents a lot of unnecessary damage.
When to Call a Professional
Most people can remove corner guards at home following our guide. However, some situations call for a professional touch. Knowing when to ask for help saves you time, money, and frustration.
If your corner guards are bonded directly to bare metal or have been on the car for over a decade, professional help may be wise. The adhesive in older vehicles bonds extremely aggressively. Removing it without damaging the underlying paint requires specialized tools and techniques.
Also consider a professional if you notice paint damage during the removal process. A small chip or scratch might seem minor, but it can lead to rust if not treated properly. A detailer or body shop can fix these issues quickly and affordably.
Finally, if you are removing guards from a leased vehicle or a high-value classic car, professional removal is worth the investment. These vehicles need extra care, and a small mistake can cost a lot in repairs or deposit deductions.
After Removal: What to Do Next
Once your corner guards are off and the surface is clean, you have options. Some car owners prefer to leave the area bare. Others want to install new guards or upgrade to a different style.
If you are going guard-less, apply a paint protection film to the exposed edges. This keeps the area safe from future dings and chips. It also gives the car a smooth, finished look.
If you are installing new guards, make sure the surface is completely free of old adhesive before you stick anything on. Use a primer if the manufacturer recommends it. This ensures the new guards bond properly and last for years.
Final Thoughts on Removing Corner Guards
Knowing how do you remove corner guards opens up a world of possibilities for your vehicle. You can refresh your car’s look, prepare it for sale, or simply replace worn-out protectors. The process is straightforward when you follow the right steps and use the proper tools.
Remember the golden rule: patience beats speed every time. Take your time with the heat, work gently with plastic tools, and clean up residue thoroughly. Your car will thank you with a clean, undamaged finish.
This is a project that almost anyone can do at home. You do not need special skills or expensive equipment. Just follow the steps in this guide and you will get professional-quality results. So grab your hair dryer, gather your tools, and get started today. Your car is going to look amazing once those old corner guards are gone.
Frequently Asked Questions
Can I remove corner guards without damaging the paint?
Yes, absolutely. The key is to use heat to soften the adhesive and plastic tools to pry gently. Avoid metal blades and never rush the process. With patience and the right method, your paint will stay completely intact.
What is the best adhesive remover for corner guard residue?
Goo Gone and isopropyl alcohol are the top choices. They dissolve adhesive safely without harming your car’s paint. Always test on a small hidden area first and use a microfiber cloth for application.
How long does it take to remove corner guards?
Most people finish the job in 20 to 40 minutes per guard. The time depends on the guard type, adhesive age, and your experience level. Taking it slow actually saves time by preventing mistakes that require paint repair.
Do I need any special tools to remove corner guards?
You need a hair dryer or heat gun, a plastic trim tool, and an adhesive remover. These are affordable and available at any auto parts store. You probably already own most of these items at home.
Can I reuse my corner guards after removing them?
It depends on the guard condition. If the adhesive is still sticky and the guard is not cracked, you can reapply it. However, most guards lose their adhesive strength after removal. New adhesive strips or replacement guards are inexpensive and widely available.
Are corner guards necessary for modern cars?
Most modern cars come with built-in paint protection and durable clear coats. Corner guards are more of a cosmetic or extra protective feature than a necessity. Many drivers prefer the clean look of a car without them, especially on newer models with strong factory paint.
=== CONCLUSION ===
Removing corner guards does not have to be scary or complicated. With the right heat, the right tools, and a patient approach, you can pull them off cleanly every single time. This guide gave you everything you need to know about how do you remove corner guards without causing damage. From the initial heat application to the final wax, each step protects your car’s finish.
Take your time, avoid the common mistakes we covered, and enjoy the process. Whether you are prepping for a sale, upgrading your look, or simply replacing old guards, you now have the knowledge to do it right. Your car deserves the best care, and now you know exactly how to give it.