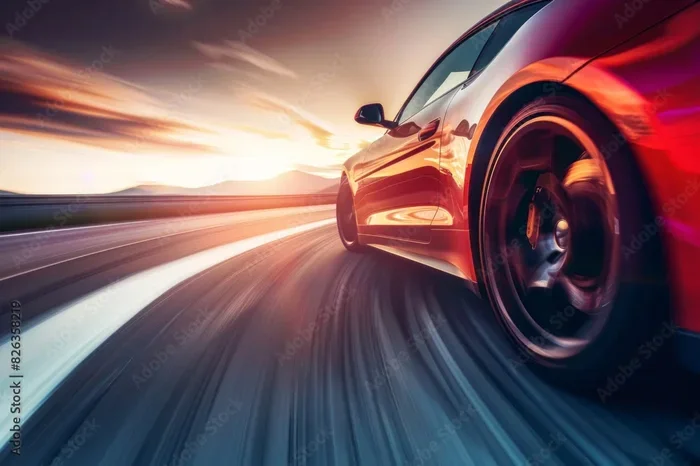
Car Drawing with Colour The Ultimate Guide for Artists
Car drawing with colour is a rewarding art form that blends technical skill with creative expression. This guide covers everything from basic sketching to advanced colour rendering techniques for realistic vehicle artwork. Whether you are a beginner or intermediate artist, you will find practical tips, step-by-step methods, and expert insights to elevate your automotive drawings.
There is something truly exciting about bringing a car to life on paper. Car drawing with colour lets you capture the sleek lines, shiny surfaces, and bold personalities of vehicles in a way that black-and-white sketches simply cannot match. Whether you dream of drawing classic muscle cars, modern supercars, or everyday family sedans, adding colour transforms your artwork from simple sketches into vibrant pieces of art.
In this guide, we will walk you through everything you need to know about automotive art and car illustration. We will cover the tools you need, the techniques that make colours pop, and the step-by-step process to create your own realistic car drawing. By the end, you will have a clear roadmap to start creating eye-catching vehicle artwork at home.
So grab your pencils, open your mind, and let us dive into the world of drawing cars with colour. No matter your skill level, there is always something new to learn when it comes to automotive drawing and vehicle artwork.
Key Takeaways
- Start with proper proportions: Getting car proportions right is the foundation of any great vehicle drawing.
- Master colour blending: Smooth colour transitions make car drawings look realistic and professional.
- Use reference images: Real photos help you capture accurate details like body lines and reflections.
- Practice shading and highlights: These techniques add depth and dimension to your automotive art.
- Choose the right tools: Coloured pencils, markers, and digital software each offer unique advantages.
- Avoid common mistakes: Skipping the sketch phase and ignoring light sources are frequent errors beginners make.
- Build skills gradually: Start simple and progress to complex renderings as your confidence grows.
📑 Table of Contents
- Why Car Drawing with Colour Matters
- Essential Tools for Drawing Cars with Colour
- Step-by-Step Process for Drawing a Car with Colour
- Essential Techniques for Realistic Car Artwork
- Common Mistakes to Avoid in Car Drawing
- Tips to Improve Your Car Drawing Skills Fast
- Comparing Traditional vs Digital Car Drawing
- Inspiration: Popular Cars to Draw with Colour
- Conclusion
Why Car Drawing with Colour Matters
Black-and-white sketches have their place. They show form and structure clearly. But when you add colour, something magical happens. The car looks alive. The paint job looks real. The reflections on the body shine through. Car drawing with colour brings a whole new dimension to your work.
Think about the last time you saw a beautifully rendered car poster or a digital artwork of a classic vehicle. The colours made you feel like you could almost reach out and touch the glossy paint. That is the power of colour rendering for cars. It connects the viewer emotionally to the artwork.
Beyond aesthetics, learning to draw cars in colour also improves your overall artistic skills. You learn about automotive color theory, how light interacts with curved surfaces, and how to create depth through shading. These are valuable skills that apply to all kinds of drawing and painting.
Who Is Car Drawing With Colour For?
Car drawing with colour is for anyone who loves vehicles and art. Here is a quick look at who benefits most:
- Beginners who want to learn the basics of drawing vehicles
- Hobbyists who enjoy sketching cars as a relaxing pastime
- Aspiring automotive artists building a portfolio of vehicle artwork
- Design students studying transportation or industrial design
- Car enthusiasts who want to capture their favourite models on paper
No matter which group you belong to, the techniques in this guide will help you improve. The key is consistent practice and a willingness to learn from mistakes.
Essential Tools for Drawing Cars with Colour
Before you start your first car drawing with colour, you need the right tools. Using proper materials makes a huge difference in the quality of your work. You do not need fancy or expensive supplies to begin, but having the basics right sets you up for success.
Pencils and Coloured Pencils
Start with a good set of graphite pencils for your initial sketch. A range from HB to 4B gives you flexibility for light lines and dark shadows. For colour, coloured pencils are a fantastic starting point. Brands like Prismacolor and Faber-Castell offer rich pigments that blend smoothly.
When choosing coloured pencils for car sketching, look for sets that include metallic shades. Silver, gold, and light grey pencils help you capture the chrome and metal surfaces that make cars look so realistic.
Markers and Ink
Alcohol-based markers like Copic and Prismacolor are popular among automotive artists. They create smooth, even layers of colour that are perfect for car bodies. Car body line drawing with markers requires a steady hand, but the results can be stunning.
Markers work best when you layer colours gradually. Start with light pressure and build up the intensity slowly. This gives you control over the final look.
Digital Tools
If you prefer working on a screen, digital tools offer incredible flexibility for car drawing with colour. Programs like Procreate, Adobe Photoshop, and Clip Studio Paint come with brushes designed for automotive rendering. You can undo mistakes, adjust colours instantly, and experiment without wasting materials.
A drawing tablet with pressure sensitivity is essential for digital work. It lets you vary line thickness and opacity naturally, just like traditional media.
Step-by-Step Process for Drawing a Car with Colour
Now let us get into the fun part. Here is a clear, step-by-step process to create your own colour car sketch. Follow these steps in order, and you will see steady improvement with each drawing you complete.
Step 1: Choose Your Reference Image
Every great car illustration starts with a good reference. Find a clear photo of the car you want to draw. Choose an image with good lighting and visible details. The photo should show the car from a slight angle, not straight on, to give you depth and perspective to work with.
Save the reference image where you can see it easily while you draw. Many artists print their reference or set it on a tablet next to their workspace.
Step 2: Sketch the Basic Shape
Start with light pencil lines. Do not press hard. You want to be able to erase these lines later without damaging your paper. Draw the basic shape of the car using simple geometric forms. A rectangle for the body, circles for the wheels, and a curved line for the roofline.
Focus on car proportions at this stage. The length of the hood, the height of the roof, and the size of the wheels all need to look correct. Spend extra time here because getting proportions right saves you from fixing problems later.
Step 3: Refine the Outline
Once your basic shape looks good, go over the outline with slightly darker lines. Add details like door handles, windows, mirrors, and the bumper shape. Keep your lines confident and smooth. This is the stage where your car body line drawing starts to take shape.
Erase any unnecessary construction lines. Leave only the clean outline and key details visible. A tidy sketch makes the colouring stage much easier.
Step 4: Block in Base Colours
Now it is time to add colour. Start by laying down the base colour for the car body. Use light, even strokes in the direction of the body panels. Do not try to get perfect coverage yet. This first layer is just about establishing the main colour.
Choose colours that match your reference photo as closely as possible. If the car is red, pick a red that matches the shade in the photo. Colour matching is an important skill in automotive art.
Step 5: Build Up Layers and Add Shadows
With the base colour down, start building layers. Use slightly darker shades in the areas where shadows fall. The shadow side of the car is usually under the roof, along the lower body, and inside wheel wells.
Apply lighter pressure on the shadow areas and gradually increase it. This creates a natural gradient from light to dark. Colour blending for cars works best when you take your time and build up thin layers rather than pressing hard all at once.
Step 6: Add Highlights and Reflections
Highlights are what make a car drawing look shiny and realistic. Use a lighter shade of your base colour or even white to add highlights where light hits the car. The hood, the top of the roof, and the centre of the doors typically catch the most light.
For chrome bumpers and mirrors, use silver and light grey pencils. Add thin white lines to suggest reflections on glass surfaces. These small details make a big difference in the final result of your realistic car drawing.
Step 7: Detail the Wheels and Interior
Wheels deserve special attention. Draw the tire with dark grey or black, then add the rim details. Chrome rims look best with silver and white highlights. Tread patterns on tires add realism and show off your observation skills.
If the windows are visible, use a light blue or grey with subtle reflections. Keep the interior simple unless it is a key focus of your drawing. A few well-placed lines for the dashboard and seats are enough.
Step 8: Final Touches and Review
Step back and look at your drawing from a distance. Check for any areas that need more contrast or colour. Add final highlights to make certain surfaces pop. Sign your work and take a moment to appreciate what you have created.
Every drawing teaches you something. Review your work and note what you want to improve next time. This reflection is how you grow as an automotive artist.
Essential Techniques for Realistic Car Artwork
Technique is what separates a simple car sketch from a professional-quality car drawing with colour. Here are the most important techniques to master.
Understanding Light and Shadow
Light is the most important factor in any drawing. Before you add colour, decide where your light source is coming from. This determines where the highlights go and where the shadows fall. Consistent lighting makes your vehicle artwork look believable and three-dimensional.
A single light source works best for beginners. It keeps things simple and predictable. As you gain experience, you can experiment with multiple light sources for more dramatic effects.
Blending Colours Smoothly
Smooth blending is a hallmark of professional car illustration. There are several ways to blend colours effectively:
- Layering: Apply light strokes of one colour, then layer another colour on top
- Burnishing: Press firmly with a white or light-coloured pencil to smooth out layers
- Blending stumps: Use tortillons or blending stumps to physically blend pencil marks
- Solvents: For marker or coloured pencil work, a blending solvent creates ultra-smooth gradients
Each method has its strengths. Experiment to find what works best for your style and tools.
Capturing Reflections and Chrome Effects
Cars are full of reflective surfaces. Getting chrome and metal effects right is one of the most satisfying parts of drawing cars with colour. Use sharp white lines on a dark background to suggest reflections. Keep these lines thin and precise.
For chrome bumpers, alternate between silver, white, and very light grey. The contrast between these tones creates the illusion of a shiny metal surface. Practice on a separate sheet before adding chrome details to your main drawing.
Perspective and Angles
Drawing a car from different angles adds variety to your portfolio. A three-quarter front view is the most popular and forgiving angle for beginners. Side views show the full length of the car and are great for practising car proportions. Front views are challenging but rewarding.
Understanding basic perspective principles helps tremendously. Parallel lines converge toward a vanishing point. The road surface and pavement lines can help ground your car in space.
Common Mistakes to Avoid in Car Drawing
Even experienced artists make mistakes. Knowing what to avoid saves you time and frustration. Here are the most common errors in car drawing with colour.
Skipping the Sketch Phase
Jumping straight into colour is tempting but risky. Without a solid sketch underneath, your proportions will likely be off and your colour placement messy. Always start with a light pencil sketch and refine it before adding any colour.
Ignoring the Light Source
Without a clear light source, your shadows and highlights will not make sense. This makes the car look flat and unrealistic. Decide on your light direction at the very beginning and stick with it throughout the drawing.
Using Too Many Colours
More colours do not mean better results. Using too many colours can make your drawing look muddy and chaotic. Stick to a limited palette that matches your reference. A great car drawing with colour often uses only a few well-chosen colours blended skillfully.
Neglecting the Wheels and Ground
Many beginners focus entirely on the car body and forget the wheels and the ground beneath. The wheels ground the car in space and add significant realism. A simple shadow beneath the car also helps anchor the drawing.
Rushing the Blending Process
Blending takes patience. If you rush it, you will see streaks and uneven patches. Build up your layers slowly and let each layer dry or set before adding the next. Slow and steady wins the race when it comes to colour rendering for cars.
Tips to Improve Your Car Drawing Skills Fast
Want to get better at automotive drawing quickly? These practical tips will accelerate your progress.
- Draw every day. Even 15 minutes of practice builds skills faster than occasional long sessions.
- Study real cars. Visit car shows or look at photos online. Notice how light hits different body panels.
- Copy master artworks. Find professional car drawings and try to replicate them. This teaches you techniques you might not discover on your own.
- Use a lightbox. Tracing reference images helps you understand car shapes and proportions more deeply.
- Focus on one element at a time. Spend a session just on wheels, another on windows, another on reflections. Mastery comes from focused practice.
- Seek feedback. Share your work with other artists. Constructive criticism helps you see blind spots in your technique.
- Keep a sketchbook. A dedicated sketchbook for automotive art lets you track your progress over weeks and months.
Comparing Traditional vs Digital Car Drawing
Both traditional and digital methods have their place in car drawing with colour. Here is a comparison to help you decide which approach suits you best.
| Aspect | Traditional (Pencils/Markers) | Digital (Tablet/Software) |
|---|---|---|
| Cost to Start | Lower initial cost | Higher upfront investment |
| Blending Ease | Requires practice and tools | Built-in blending brushes |
| Undo Capability | Limited | Unlimited undo |
| Tactile Feel | Real texture and paper grain | Smooth digital surface |
| Portability | Highly portable | Requires tablet and charger |
| Colour Flexibility | Limited by physical supplies | Infinite colour options |
| Learning Curve | Gentler for beginners | Requires software learning |
Many professional automotive artists use both methods. They sketch traditionally and then refine or colour digitally. You can find your own workflow as you experiment with both approaches.
Inspiration: Popular Cars to Draw with Colour
Choosing the right car to draw can make the process more enjoyable and motivating. Here are some popular choices for car drawing with colour:
- Classic Mustangs: Their bold curves and iconic shape make them a favourite among automotive artists
- Japanese Sports Cars: Clean lines and sleek designs are perfect for practising smooth colour transitions
- Vintage Trucks: The angular shapes and chrome details offer great practice for reflections and metal effects
- Modern Supercars: Low, wide, and aggressive profiles challenge your skills in perspective and shading
- Classic Convertibles: The open-top design introduces interesting window and fabric details to work on
Pick a car you love. Your enthusiasm will show in the final drawing and keep you motivated through the learning process.
Conclusion
Car drawing with colour is a fantastic creative journey that combines technical skill with artistic passion. From choosing the right tools to mastering blending and reflection techniques, every step brings you closer to creating stunning automotive art. The process is not always easy, but it is incredibly rewarding.
Remember that every professional artist started exactly where you are now. They made mistakes, had drawings they were not happy with, and kept practising anyway. The difference between a beginner and an expert is simply time and persistence.
Now it is your turn. Pick up your pencils, find a car you love, and start drawing. Apply the techniques you have learned in this guide. Share your progress, learn from each piece, and most importantly, enjoy the process. Your journey into car illustration and vehicle artwork starts with a single line. Make it a great one.
Frequently Asked Questions
What is the best way to start learning car drawing with colour?
Begin with a simple side-view sketch of a car you like. Use light pencil lines for the outline, then block in base colours with coloured pencils or markers. Focus on getting proportions right before worrying about details. Consistent daily practice is the fastest path to improvement.
Do I need expensive tools to draw cars with colour?
No, you do not need expensive tools to create great car drawings with colour. A basic set of coloured pencils, a few graphite pencils, and a good reference photo are enough to get started. As you improve, you can invest in higher-quality materials or digital tools.
How long does it take to draw a realistic car with colour?
A detailed realistic car drawing can take anywhere from two hours to several days depending on the level of detail and your experience level. Beginners should expect their first few drawings to take longer. With practice, your speed and quality will both improve significantly.
What is the hardest part of car drawing with colour?
Most artists find blending colours smoothly and capturing reflections the most challenging aspects. Chrome effects, glass reflections, and glossy paint finishes require patience and practice. Focus on one technique at a time and you will see steady progress.
Can I learn car drawing with colour if I am a complete beginner?
Absolutely. Car drawing with colour is accessible to artists of all skill levels. Start with simple shapes and basic colours. Follow step-by-step guides, watch tutorials, and practice regularly. Everyone starts somewhere, and every drawing makes you better than the last one.
Should I draw from photos or from imagination?
Both approaches have value. Drawing from photos helps you learn accurate proportions, details, and colour matching. Drawing from imagination builds your creative skills and personal style. A balanced approach using both references and imagination will make you a more versatile automotive artist.