How to Vinyl Wrap a Car the Easy Way at Home Today
Learning how to vinyl wrap a car at home is easier than you think. This guide walks you through every step, from choosing the right vinyl film to applying it like a pro. You will save hundreds of dollars and transform your ride with a color change wrap that looks stunning. Follow along and discover the DIY car wrap process that delivers real results.
Have you ever looked at a car with a color change wrap and thought, “I wish my car looked like that”? The good news is that vinyl wrapping a car at home is totally doable. You do not need a professional studio or years of experience. With the right car wrapping kit and a weekend of free time, you can completely transform your vehicle’s look.
How to vinyl wrap a car the easy way at home starts with understanding the basics. This guide breaks down every single step in simple language. You will learn what tools to grab, how to prep your surface, and exactly where to start. By the end, you will feel confident enough to tackle the whole project yourself.
Thousands of car owners are choosing DIY automotive wrapping over expensive professional jobs. A full vehicle wrap from a shop can cost anywhere from $2,000 to $5,000. Doing it yourself cuts that cost dramatically. Plus, you get the satisfaction of learning a new skill and protecting your original paint underneath. Let us dive into everything you need to know.
Key Takeaways
- You can wrap your car at home with basic tools, patience, and the right technique.
- Surface preparation is the most important step for a bubble-free finish.
- A heat gun and squeegee are essential tools that make installation smooth.
- Start with large flat panels like hoods and roofs before tackling curves.
- Avoid common mistakes like stretching vinyl, skipping cleaning, and rushing the process.
- Proper maintenance keeps your wrap looking great for 5 to 7 years.
📑 Table of Contents
Why Vinyl Wrap a Car at Home?
There are many reasons why DIY car wrapping has become so popular. First, it saves a significant amount of money. A professional automotive wrap costs a fortune, but doing it yourself keeps costs low. Second, you have complete control over the design. You pick the color, the finish, and the style.
Third, wrapping protects your car’s original paint. Think of it as a giant paint protection film for your entire vehicle. If you ever decide to sell, the underlying paint stays fresh and undamaged. This actually helps maintain resale value.
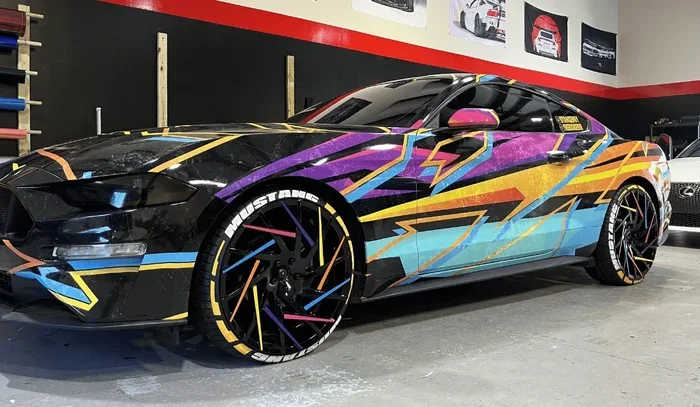
Finally, learning how to vinyl wrap a car gives you creative freedom. Want a matte black finish? Go for it. Prefer a glossy red look? Easy. You can even do two-tone designs or add custom vehicle decals along the way. The possibilities are truly endless when you wrap at home.
Cost Savings of DIY Wrapping
The biggest draw for most people is the vinyl wrap cost savings. A full professional job typically runs between $2,000 and $5,000. When you do it yourself, your material costs range from $500 to $2,000 depending on the type of vinyl film you choose. That is a huge difference.
You also save on labor. Professionals charge for their time, and that adds up fast. When you work at your own pace in your garage, there is no rush. You can take your time to get every edge perfect.
Creative Freedom and Customization
Professional shops offer a limited selection of standard colors. When you wrap at home, you are not limited. You can choose matte wrap finishes, satin textures, chrome, or even custom printed designs. Some gloss vinyl options mimic a wet paint look that looks absolutely incredible.
You can also wrap just specific sections of your car. Want a color accent on the hood or roof? That is called a partial wrap, and it is a great way to start if you are nervous about a full wrap overlay. Either way, the creative options are wide open.
Tools and Materials You Need
Before you start how to vinyl wrap a car, you need to gather everything. Having the right car wrapping tools makes the process much smoother. Trust me, trying to wrap without a squeegee or heat gun is a recipe for frustration.
Essential Wrapping Supplies
Here is a list of everything you will need for a successful vinyl wrap installation:
- Pre-cut vinyl wrap kit or a large roll of automotive vinyl film
- Heat gun (a household hair dryer can work in a pinch)
- Plastic squeegee or felt-edge squeegee
- Isopropyl alcohol (at least 70% concentration)
- Microfiber cloths (lint-free, at least 10 of them)
- Razor blade or utility knife with extra blades
- Wrap solution or a mix of water and a few drops of dish soap
- Tape measure and a soft measuring tape
- Trim removal tools (plastic pry tools to avoid scratches)
- Clay bar for final surface prep
Choosing the Right Vinyl Type
Not all vinyl wrap material is the same. The type you choose affects the final look and durability. Here is a quick comparison to help you decide:
| Vinyl Type | Finish | Durability | Best For |
|---|---|---|---|
| Gloss Vinyl | High shine | 5-7 years | Show cars, fresh look |
| Matte Vinyl | Flat, no shine | 5-6 years | Modern, stealth look |
| Satin Vinyl | Soft sheen | 5-7 years | Balanced aesthetic |
| Chrome Vinyl | Mirror-like | 3-5 years | Bold statement |
| Color Shift Vinyl | Changes with light | 4-6 years | Unique custom look |
For beginners, matte vinyl or gloss vinyl are the easiest to work with. They are forgiving and hide small mistakes better than chrome or color shift options. If you are unsure, go with a standard gloss finish to start.
Preparing Your Vehicle the Right Way
Surface preparation is the single most important part of how to vinyl wrap a car. If your surface is not clean and smooth, the wrap adhesive will not bond properly. You will end up with wrap bubbles, peeling edges, and an ugly finish.
Cleaning the Surface
Start by giving your entire car a thorough wash. Use a car detailing soap and a soft microfiber wash mitt. Pay special attention to areas where dirt builds up, like around door handles, bumpers, and trim. Rinse well and dry completely with a clean microfiber towel.
Next, wipe down every surface with isopropyl alcohol using a fresh cloth. This removes any remaining oils, wax, or grease. Work panel by panel so you do not miss any spots. The surface should feel completely clean and slightly tacky before you begin applying the vinyl film.
Removing Trim and Accessories
Before you start wrapping, remove any trim pieces that get in the way. Door handles, side mirrors, and emblems can make the wrapping process much harder. Use plastic pry tools to gently remove clips and fasteners.
You do not need to remove every single piece. Focus on the areas where the wrap needs to stretch around tight corners. If you can remove a mirror or door handle temporarily, do it. It will save you a lot of headaches later.
Measuring and Cutting the Vinyl
Measure each panel carefully before cutting. Add about 2 to 3 inches of extra vinyl wrap material on each side. This gives you room to adjust and fold edges. Always cut more than you need rather than less.
Use a soft measuring tape for curved areas. Mark your cutting lines with a light pencil mark so you can see it but it will not show on the final finish. Cut slowly and steadily for clean edges.
Step-by-Step Vinyl Wrap Process
Now comes the fun part. Here is the full how to vinyl wrap a car process broken down into manageable steps. Follow them in order and you will get a professional-looking result.
Step 1: Apply the Wrap Solution
Mix a wrap solution using water and a few drops of dish soap. Spray the solution onto the car panel first, then lay the vinyl film on top. The soapy water allows the vinyl to slide and reposition before it sticks. This is a game-changer for beginners.
Step 2: Position the Vinyl
Start with a large flat panel like the hood or roof. These are the easiest areas to wrap because they have minimal curves. Carefully lay the vinyl onto the wet surface, centering it as best you can.
Use your hands to gently push out excess wrap solution toward the edges. Work from the center outward. This prevents trapped air and helps the vinyl settle into place.
Step 3: Use the Squeegee
Take your squeegee and start smoothing the vinyl firmly. Work from the center toward the edges with light to medium pressure. The squeegee pushes out water and air pockets underneath the film.
Go slowly and overlap each pass slightly. You want to see the water being pushed out as you work. If you see air bubbles forming, lift the edge gently and re-squeegee that area.
Step 4: Apply Heat with the Heat Gun
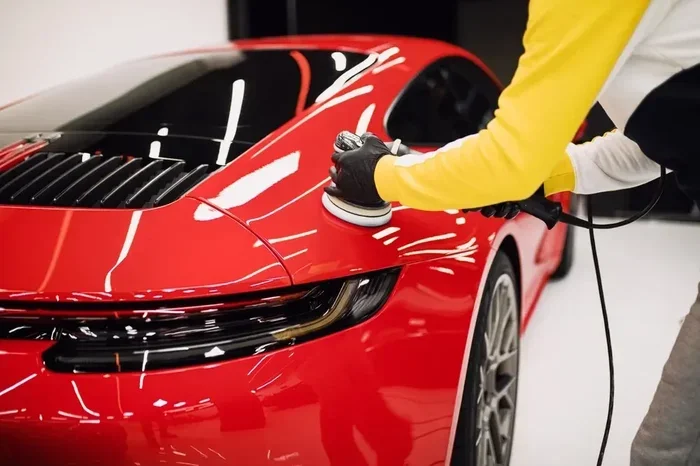
Once the vinyl is in place, use your heat gun to activate the wrap adhesive. Hold the heat gun about 6 inches from the surface and move it in slow, sweeping motions.
The heat makes the vinyl more flexible, which is essential for wrapping curves and tight edges. You will feel the vinyl become softer and more pliable. This is the perfect time to push it into contours, around mirrors, and along door edges.
Step 5: Trim the Edges
After the vinyl cools and sets, use a razor blade to trim the excess material. Hold the blade at a shallow angle and cut carefully along the edges. Go slow to avoid scratching the vinyl surface or the paint underneath.
Use a fresh blade for each panel. Dull blades drag and can damage the finish. Keep a bucket of warm water nearby to rinse off any trimming debris as you work.
Step 6: Repeat for Each Panel
Continue the same process for every panel. Work on the doors, fenders, bumpers, and any remaining sections. Start with the large, flat areas first and save the tight curves for last. This approach builds your confidence as you go.
Each panel follows the same basic steps: spray solution, position vinyl, squeegee out water, apply heat, and trim edges. Once you get the rhythm down, the process becomes much faster and easier.
Handling Curves and Complex Areas
Curves are the trickiest part of any DIY car wrap. Areas like the mirror housings, door handles, and bumper edges require extra care. Apply more heat than usual to make the vinyl stretch without wrinkling.
Use your fingers to push the vinyl into tight spaces. You can also use a plastic wrap tool to help shape the film around curves. Take your time and do not rush these areas. Precision here makes the difference between a good wrap and a great one.
Common Mistakes to Avoid
Even experienced DIY wrap enthusiasts make mistakes. The key is knowing what to avoid so you do not waste vinyl film or ruin your finish.
Skipping Surface Preparation
This is the number one mistake people make. If you do not clean the surface properly, the wrap adhesive will not hold. Dust, wax, and oils create a barrier between the vinyl and the paint. Always clean every panel thoroughly before applying any film.
Stretching the Vinyl Too Much
Forcing the vinyl to stretch causes it to thin out. Thin spots become translucent and show the paint underneath. They also weaken over time, leading to peeling and bubbling. Let the heat do the work for you. Apply enough heat and the vinyl will conform naturally.
Rushing the Process
How to vinyl wrap a car properly takes time. Rushing leads to misaligned pieces, trapped air, and sloppy edges. Give yourself a full weekend for the project. Work in calm conditions without wind or direct sunlight. Both of these can cause the wrap solution to dry too fast.
Using the Wrong Tools
Do not try to wrap with household items that are not designed for the job. A regular household sponge can leave lint behind. A metal ruler can scratch your vinyl finish. Invest in proper car wrapping tools and you will thank yourself later.
Ignoring Temperature and Humidity
Ideal wrapping conditions are between 60 and 80 degrees Fahrenheit with low humidity. Cold temperatures make the vinyl stiff and hard to work with. High humidity slows the curing process. If you can, work in a heated garage for the best results.
Maintaining and Caring for Your Wrap
Once your car wrap is installed, proper maintenance keeps it looking fantastic for years. The good news is that caring for a vinyl wrap is simple and straightforward.
Daily Care Tips
Wash your wrapped car the same way you would a painted vehicle. Use a gentle car wash soap and a soft microfiber mitt. Avoid high-pressure washers directly on the edges, as they can peel the vinyl over time.
Dry the car with a clean microfiber towel after washing. This prevents water spots from settling into the wrap surface. A quick wipe-down after rain or snow also helps maintain the finish.
What to Avoid
- Automated car washes with harsh brushes
- Abrasive cleaning pads or rough sponges
- Petroleum-based cleaning products
- Waxing the wrap (most wraps do not need wax)
- Parking under trees for extended periods
Avoid anything that could scratch or degrade the vinyl film. Stick to gentle cleaning methods and your wrap will stay vibrant for a long time.
How Long Does a Wrap Last?
A well-maintained automotive wrap lasts between 5 and 7 years. The lifespan depends on the quality of the vinyl material, how well you prep the surface, and how regularly you maintain it. High-quality gloss vinyl and matte wrap options tend to hold up the longest.
If you notice edges starting to lift or small bubbles forming, address them quickly. A tiny bubble can grow over time and affect the overall look. Use your heat gun to gently press the edge back down before it gets worse.
Removing a Wrap When You Are Ready for a Change
One of the best things about vinyl wrap is that it is removable. When you are ready for a new look, you can simply peel the wrap film off. Heat the edges with your heat gun to loosen the adhesive, and pull slowly.
Most wrap adhesives are designed to come off cleanly without damaging the original paint. If any sticky residue remains, use a vinyl-safe adhesive remover and a soft cloth to clean it away. Your original paint will be right underneath, fresh and protected.
Expert Insights on Wrapping Like a Pro
Professional wrappers share a few secrets that make a huge difference in the final result. Here are some expert tips to elevate your DIY wrap game.
First, always work in sections. Do not try to apply a full panel of vinyl all at once. Break it into smaller pieces and work methodically. This gives you more control and reduces the chance of mistakes.
Second, keep a heat gun moving constantly. Holding it in one spot too long can overheat the vinyl and cause it to shrink or bubble. Keep the heat gun at least 6 inches away and move in smooth, even strokes.
Third, invest in quality vinyl wrap material. Cheap vinyl may seem like a bargain, but it often shrinks, discolors, and peels within a year or two. Spending a little more on a reputable automotive vinyl film pays off in the long run.
Finally, practice on a scrap piece of metal or an old panel before you commit to your car. This lets you get comfortable with the technique without risking your finish. Once you feel confident, you are ready to wrap for real.
Key Takeaways
- Wrapping at home saves significant money compared to professional automotive wrapping costs.
- Surface preparation is non-negotiable for a smooth, bubble-free finish.
- Start with flat panels and work your way to curves and tight areas.
- Use a heat gun and squeegee as your primary tools for a professional result.
- Avoid stretching the vinyl and rushing the process to prevent wrinkles and bubbles.
- Maintain your wrap with gentle washing and proper storage conditions.
- Practice first on a scrap surface to build confidence before tackling your vehicle.
Conclusion
How to vinyl wrap a car at home is a rewarding project that anyone can learn. You do not need expensive equipment or years of training. With the right vinyl wrap kit, proper preparation, and patience, you can achieve a stunning color change wrap that turns heads everywhere you go.
The process breaks down into simple steps: clean the surface, apply the solution, position the vinyl film, squeegee out the water, apply heat, and trim the edges. Follow those steps on every panel and you will have a wrap that looks like it came from a professional shop.
Remember to avoid common mistakes like skipping surface prep, stretching the vinyl too much, and rushing through the process. Take your time, work in good conditions, and use quality materials. Your DIY car wrap will look incredible and protect your paint for years to come.
Now that you know how to vinyl wrap a car the easy way at home today, it is time to grab your tools and get started. Your car is waiting, and the transformation is just a weekend away. Happy wrapping!
Frequently Asked Questions
How long does it take to vinyl wrap a car at home?
A full DIY car wrap typically takes one to two full weekends, depending on your experience level and the size of the vehicle. First-time wrappers should plan for extra time as they learn the technique. Working on one section at a time helps keep the process manageable and stress-free.
Can you vinyl wrap a car with existing paint damage?
It is best to repair any paint damage before applying a vinyl film. The wrap adhesive bonds best to a smooth, clean surface. Wrapping over chipped or rusted paint can trap moisture and make the damage worse underneath. Fix any paint issues first for the best long-term results.
Is vinyl wrap removable without damaging the paint?
Yes, most quality vinyl wrap products are designed to be fully removable without harming the original paint. The wrap adhesive is engineered to release cleanly when heated. However, the age and condition of the paint can affect how easily it comes off. Always test a small hidden area first.
What is the best type of vinyl for beginners?
Gloss vinyl and matte vinyl are the most forgiving options for beginners. They are easier to apply, hide small mistakes better, and are widely available. Chrome and color shift wraps require more advanced skills because they show every imperfection clearly. Start simple and work your way up.
How do I get rid of wrap bubbles?
Small bubbles often disappear on their own as the wrap adhesive cures. For stubborn bubbles, use your heat gun to warm the area gently, then press the bubble out with your finger or a squeegee. Work slowly to avoid stretching the vinyl. A tiny pinprick can also release trapped air if needed.
How much does it cost to vinyl wrap a car yourself?
A DIY car wrap typically costs between $500 and $2,000 in materials, depending on the type of vinyl film and the size of your vehicle. This is a fraction of the $2,000 to $5,000 professional shops charge. Investing in quality vinyl wrap material upfront saves money and frustration in the long run.