Do I Need to Sand Before Touch-Up Paint Tips Explained
Do I need to sand before touch-up paint? The short answer is: it depends on the damage and surface condition. Light scratches often don’t need sanding, but deeper chips and rust spots almost always do. Proper surface preparation is the secret to a smooth, lasting repair that blends perfectly with your car’s original paint.
You just spotted a fresh scratch on your hood. Maybe a shopping cart left its mark, or a key slipped across the door. Either way, your first instinct is to grab a bottle of touch-up paint and fix it fast. But then a question hits you: do I need to sand before touch-up paint? It seems like a small detail, but it makes a huge difference in how the repair looks and how long it lasts.
The truth is, sanding before touch-up paint isn’t always necessary. Sometimes it can even make things worse if you do it wrong. However, for deeper damage, rust spots, or areas where the paint has chipped down to bare metal, sanding is absolutely essential. Let’s walk through exactly when you should sand, when you can skip it, and how to do it right every single time.
Whether you’re a DIY car enthusiast or someone who just wants to keep their ride looking great between professional detailings, this guide covers everything you need to know. We’ll break down surface preparation, the right tools to use, and simple techniques that deliver professional-grade results at home. No fancy garage required.
Key Takeaways
- Sanding improves paint adhesion: Roughing up the surface helps touch-up paint bond properly and last longer.
- Not every scratch needs sanding: Surface-level scuffs can often be fixed with just a cleaner and polish.
- Rust must be removed first: Any trace of rust will spread under new paint if you don’t sand it away completely.
- Wet sanding gives the best finish: Using water with fine-grit sandpaper prevents swirl marks and creates a smooth surface.
- Primer is essential for deep damage: Bare metal or deep chips need primer before applying color coat and clear coat.
- Blending is key for invisible repairs: Feathering the edges of your touch-up area makes the fix nearly undetectable.
- Patience pays off: Rushing the prep work is the number one reason touch-up paint jobs fail.
📑 Table of Contents
- Why Surface Prep Matters for Touch-Up Paint
- When You DO Need to Sand Before Touch-Up Paint
- When You DON’T Need to Sand Before Touch-Up Paint
- How to Sand Properly Before Touch-Up Paint
- Common Mistakes to Avoid When Sanding for Touch-Up Paint
- Tools and Products You’ll Need
- Expert Insights on Touch-Up Paint Sanding
- Key Takeaways
- Conclusion
Why Surface Prep Matters for Touch-Up Paint
Think of touch-up paint like a bandage on a wound. If the skin around the wound is dirty and oily, the bandage won’t stick. The same principle applies to your car’s paint job. Surface preparation is the foundation of any successful paint repair. Without it, even the best automotive touch-up paint will peel, bubble, or chip away within weeks.
When paint adheres properly, it forms a strong bond with the existing surface. This bond depends entirely on how clean and how textured the area is. Factory paint has a smooth, glossy finish that resists adhesion. New touch-up paint needs something to grip onto. That’s where sanding comes in. It creates tiny scratches that give the new paint something to hold onto, almost like tiny little hooks.
But here’s the thing many people get wrong. Sanding isn’t a one-size-fits-all step. The depth of the damage, the type of paint, and the condition of the surrounding area all determine whether you should sand. Let’s dive into the specifics so you never have to guess again.
What Happens When You Skip Surface Prep
Skipping surface prep is the fastest way to ruin a touch-up job. Here’s what can go wrong if you just paint over a dirty or glossy surface:
- Poor adhesion: The new paint sits on top of the old layer instead of bonding with it. It looks fine at first but flakes off after a few washes.
- Visible edges: Without proper blending, the touch-up spot stands out like a sore thumb. The edges are sharp and obvious.
- Peeling and bubbling: Moisture gets trapped between layers. Over time, bubbles form under the paint, and the whole repair lifts away.
- Color mismatch issues: Even with a perfect color match, an improperly prepped surface makes the repair look uneven and patchy.
These problems are completely avoidable with just a few minutes of proper prep work. The effort you put in beforehand determines how professional the final result looks.
When You DO Need to Sand Before Touch-Up Paint
Not all damage requires sanding. But certain types of scratches and chips absolutely demand it. Here’s how to know when sanding is the right move.
Deep Chips That Exposed Bare Metal
If you can see bare metal underneath a chip, sanding is non-negotiable. Bare metal is extremely vulnerable to rust prevention. Even a tiny speck of rust left under your touch-up paint will spread underneath the new coat like a stain on fabric. You’ll end up with a much bigger problem than the original chip.
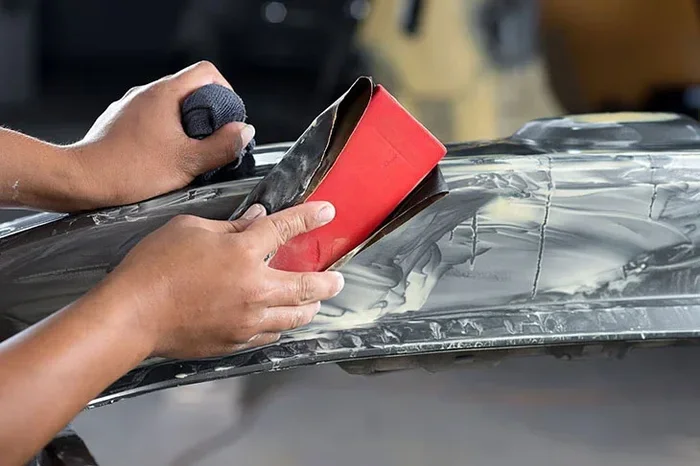
Before applying any paint, you need to remove every trace of rust. Use a paint sanding block with fine-grit sandpaper to gently smooth the area around the chip. Work outward in a circular motion until all rough, flaking paint and rust are gone. The goal is to create a clean, stable surface for the new paint to bond with.
Scratches That Go Through the Clear Coat
Your car’s paint system has multiple layers. There’s the base color coat, and then a clear coat on top that gives it shine and protection. When a scratch breaks through the clear coat and into the color layer, sanding helps blend the repair zone. This process is called paint blending, and it’s what separates a visible repair from an invisible one.
For clear coat scratches, use a wet sanding technique. Add water to the surface and use a fine-grit sanding sponge. The water keeps the sandpaper from clogging and prevents deep scratches. Work gently, checking your progress often. You want to create a smooth, frosted texture that the new paint can grip.
Areas With Rust or Oxidation
Rust is a paint killer. If you’ve got any rust forming on your car, you must address it before touching up the paint. Sanding removes the rusted metal and creates a clean surface. For light surface rust, a paint sanding block with 600 to 800 grit sandpaper works well. For heavier rust, you might need to start with a coarser grit and work your way finer.
After sanding away the rust, wipe the area with a rust converter or a clean cloth dampened with rubbing alcohol. This ensures no microscopic rust particles remain. Once the area is dry, you’re ready for primer and paint.
When the Surrounding Paint Is Chipped or Peeling
Sometimes the damage isn’t just the spot you’re trying to fix. The paint around the chip might be chipped or lifting too. In this case, you need to sand the entire affected area to create a uniform surface. Painting over peeling paint is a recipe for failure. The new paint will just lift the old paint along with it.
Use a paint sanding block to smooth out the chipped areas. Feather the edges by sanding gradually outward, creating a smooth transition between the damaged zone and the intact paint. This feathering is critical for a seamless repair.
When You DON’T Need to Sand Before Touch-Up Paint
Here’s some good news. Not every scratch or chip requires sanding. In fact, sanding the wrong areas can create new problems. Let’s look at when you can skip this step entirely.
Surface-Level Scuffs and Swirl Marks
Those light marks that look like someone dragged a fingernail across your paint are usually just surface scuffs. They sit in the clear coat and don’t penetrate the color layer. For these, sanding is overkill. Instead, use a buffing compound and a microfiber cloth to polish the mark out. The abrasive compound gently removes the scuff without damaging the paint beneath it.
Apply a small amount of compound to a clean cloth. Work it into the scuff using light, circular motions. Wipe away the residue and check your progress. Most surface scuffs disappear after just a few passes. If the mark is still visible, a second pass usually does the trick.
Very Small Stone Chips With No Rust
Tiny stone chips that haven’t reached bare metal can often be touched up without any sanding at all. These small spots are too minor to warrant altering the surrounding paint. Just clean the area with rubbing alcohol, apply your touch-up paint with a precision applicator, and let it dry. The existing clear coat around the chip will help the new paint blend in naturally.
For these small repairs, a paint pen or a touch-up kit with a fine-tip brush works perfectly. The key is to apply thin, even coats. Build up the paint gradually rather than applying one thick layer. Thin coats dry better, bond stronger, and look more natural.
Fresh Damage With Intact Paint Around It
If the damage is fresh and the paint around it is completely intact, you may be able to skip sanding. Clean the area thoroughly, apply a thin layer of primer if the chip is deep, and then apply the color coat. The existing paint provides a natural boundary that helps the repair blend.
However, keep in mind that even fresh damage benefits from light scuffing. If you want the most durable and invisible repair, a very light scuff with 1500-grit sandpaper can improve adhesion without being noticeable. It’s a personal choice based on how much effort you want to put in and how perfect you want the result to look.
How to Sand Properly Before Touch-Up Paint
If you’ve determined that sanding is necessary, doing it right matters just as much as the decision to sand at all. Here’s a step-by-step guide to sanding like a pro.
Step 1: Clean the Area Thoroughly
Before you ever touch sandpaper to paint, wash the area with soap and water. Remove all dirt, wax, and grime. Wax in particular creates a barrier that prevents paint from bonding. Use a car wash soap and a soft microfiber mitt. Dry the area completely with a clean towel before moving on.
Step 2: Choose the Right Grit
Not all sandpaper is the same, and using the wrong grit can damage your paint. Here’s a quick guide:
- 320 to 400 grit: Coarse. Use only for heavy rust removal or rough spots. Too aggressive for most touch-up prep.
- 600 grit: Medium. Good for smoothing chipped paint and feathering edges before a repair.
- 800 grit: Fine. Ideal for light scuffing to improve paint adhesion without visible damage.
- 1000 to 1500 grit: Very fine. Best for wet sanding clear coat scratches and creating a smooth, frosted texture.
For most touch-up repairs, 800 to 1000 grit sandpaper strikes the perfect balance. It’s abrasive enough to create grip but gentle enough to avoid noticeable scratches.
Step 3: Use the Wet Sanding Technique
Wet sanding involves using water as a lubricant while you sand. This technique gives you much more control and produces a smoother finish. Here’s how to do it:
- Fill a spray bottle with clean water and a drop of car wash soap.
- Soak your sandpaper in water for a minute or two before starting.
- Spray the area you’re sanding with the soapy water.
- Sand in straight lines or gentle circles, keeping the surface wet at all times.
- Check your progress frequently by wiping the area dry.
Wet sanding prevents the sandpaper from clogging with paint particles. It also cools the surface, reducing the risk of heat damage. The result is a smooth, even texture that new paint loves.
Step 4: Wipe and Dry the Area
After sanding, wipe the area with a clean, lint-free cloth dampened with rubbing alcohol. This removes all dust, oils, and contaminants. Let the surface dry completely before applying primer or paint. Any moisture left on the surface can cause bubbling and adhesion problems.
Step 5: Apply Primer (If Needed)
For any damage that reaches bare metal, always apply a coat of primer before your touch-up paint. Primer protects the metal from rust and gives the color coat something to grip. Apply a thin, even layer and let it dry completely according to the product instructions. Usually about 20 to 30 minutes for most primers.
Common Mistakes to Avoid When Sanding for Touch-Up Paint
Even experienced DIYers make mistakes with sanding. Here are the most common errors and how to avoid them.
Using Sandpaper That’s Too Coarse
This is the number one mistake. Heavy-grit sandpaper like 320 or 400 leaves deep scratches that are visible even after painting. Always start with a finer grit and only go coarser if absolutely necessary. Remember, the goal is to create a texture the paint can grip, not to strip the paint away.
Sanding Too Aggressively
Pressing too hard or sanding too long damages the paint beyond the repair area. You’ll create swirl marks and dull spots that are just as visible as the original scratch. Use light, even pressure and stop as soon as the surface looks frosted and uniform.
Skipping the Cleaning Step After Sanding
Sanding creates a cloud of fine dust that sticks to the surface. If you paint over this dust, the repair will look rough and textured. Always wipe the area with rubbing alcohol after sanding and before painting. This step takes ten seconds and makes a massive difference.
Forgetting to Protect Surrounding Paint
When you sand a specific spot, the surrounding paint can get accidentally scratched too. Use painter’s tape to mask off the area around your repair. This keeps your sanding contained and protects the pristine paint next to the damage zone.
Not Letting Primer and Paint Dry Fully
Rushing the drying process is a recipe for smudging and peeling. Always follow the manufacturer’s drying times. Applying the next coat too early traps moisture underneath and weakens the entire repair. Patience is your best friend here.
Tools and Products You’ll Need
Having the right tools makes the entire process smoother and faster. Here’s what we recommend for a DIY touch-up paint job:
- Paint sanding block: A flexible block that holds sandpaper securely and prevents uneven pressure. Look for ones with a soft foam base.
- Sandpaper assortment: 800, 1000, and 1500 grit sheets. These three grits cover virtually every touch-up scenario.
- Spray bottle with soapy water: Essential for wet sanding. Any spray bottle works as long as it produces a fine mist.
- Rubbing alcohol (90% or higher): For final cleaning before painting. Removes oils and residual dust.
- Microfiber cloths: Lint-free and soft. You’ll need several for cleaning and drying throughout the process.
- Touch-up paint pen or brush kit: Choose one that matches your car’s paint code. You can find the code on the driver’s side door jamb.
- Primer spray or pen: For any damage reaching bare metal. A quality primer makes the repair last much longer.
- Clear coat applicator: The clear coat seals everything in and gives the repair its glossy finish. Don’t skip this step.
- Buffing compound: For blending the repair after everything has dried. This removes any slight texture differences between the old and new paint.
Investing in a quality touch-up kit saves you time and frustration. Most kits include everything you need for a complete repair. Look for kits that offer a lifetime paint guarantee and include clear coat. Brands like Dupli-Color, Subaru, Toyota, and Paint Scratch offer reliable options for most vehicle makes and models.
Expert Insights on Touch-Up Paint Sanding
Professional auto body technicians have a few tricks that make touch-up repairs nearly invisible. Here’s what the experts want you to know.
Always sand outside the damage zone. When feathering edges, extend your sanding slightly beyond the visible damage. This creates a gradual transition that the eye can’t detect. The repair zone should blend seamlessly into the surrounding paint.
Less is more with primer. A thin primer coat looks better than a thick one. Thick primer shrinks as it dries, creating an uneven surface. Multiple thin coats give you a smoother, more durable base for your color coat.
Let the paint cure fully before buffing. Touch-up paint needs at least 48 hours to fully harden. Buffing too early creates swirl marks and removes the paint before it has fully set. Wait at least two days, then use a buffing compound and a soft pad to blend the repair.
Work in shaded areas. Direct sunlight heats the paint too quickly, causing uneven drying and visible lap marks. Find a shaded spot or work in a garage for the best results.
Key Takeaways
- Sandning improves paint adhesion: Roughing up the surface helps touch-up paint bond properly and last longer.
- Not every scratch needs sanding: Surface-level scuffs can often be fixed with just a cleaner and polish.
- Rust must be removed first: Any trace of rust will spread under new paint if you don’t sand it away completely.
- Wet sanding gives the best finish: Using water with fine-grit sandpaper prevents swirl marks and creates a smooth surface.
- Primer is essential for deep damage: Bare metal or deep chips need primer before applying color coat and clear coat.
- Blending is key for invisible repairs: Feathering the edges of your touch-up area makes the fix nearly undetectable.
- Patience pays off: Rushing the prep work is the number one reason touch-up paint jobs fail.
Conclusion
So, do I need to sand before touch-up paint? The answer comes down to the type and depth of the damage. Light scuffs and tiny stone chips usually don’t need sanding, but deeper chips, rust spots, and clear coat scratches absolutely do. Proper surface preparation is the single most important factor in a successful touch-up repair.
When you take the time to sand correctly, clean thoroughly, and apply your paint in thin, even layers, the results speak for themselves. Your repair becomes virtually invisible, and the paint lasts for years instead of weeks. It’s a small investment of time that pays off big.
Remember, the goal isn’t just to cover the damage. It’s to make the repair disappear. With the right approach, the right tools, and a little patience, you can make your car look as good as new without spending a dime at the body shop. Grab your touch-up paint kit, follow these steps, and enjoy the satisfaction of a job well done.
Frequently Asked Questions
Can I use touch-up paint without sanding on a small chip?
Yes, for very small chips that haven’t reached bare metal, you can skip sanding. Clean the area with rubbing alcohol, apply the paint with a fine brush or pen, and let it dry. However, light scuffing with 1000-grit sandpaper will improve adhesion and make the repair last longer even on small chips.
What grit sandpaper should I use for touch-up paint prep?
For most touch-up repairs, 800 to 1000 grit sandpaper is ideal. It’s fine enough to avoid visible scratches but coarse enough to create a surface the new paint can bond with. For heavy rust removal, start with 400 grit and work up to 800 grit for the final pass.
How do I know if a scratch needs sanding or just polishing?
Run your fingernail across the scratch. If your nail catches, the scratch has penetrated beyond the clear coat and needs sanding and repainting. If your nail glides over it smoothly, it’s likely a surface-level swirl mark that can be removed with a buffing compound and polish.
Do I need to apply clear coat after touch-up paint?
Yes, clear coat is essential for any repair that goes down to the color layer. The clear coat protects the color paint from UV damage, chips, and oxidation. It also gives the repair its glossy finish and makes it blend with the surrounding paint. Apply one to two thin coats after the color paint has fully dried.
How long should I wait before washing my car after a touch-up repair?
Wait at least 48 to 72 hours before washing your car after a touch-up repair. The paint needs time to fully cure and harden. Washing too early can damage the fresh paint and compromise the entire repair. After 72 hours, wash gently by hand and avoid high-pressure sprayers directly on the repair.
Will touch-up paint match my car’s original color perfectly?
Touch-up paint can come very close to a perfect match when you use the correct paint code for your vehicle. The code is found on the driver’s side door jamb or in your owner’s manual. Keep in mind that factory paint can fade over time, so a new touch-up spot may appear slightly different in direct sunlight. Applying clear coat helps minimize this difference.