How Do You Remove a Wraparound Light Cover Step by Step
Removing a wraparound light cover is a simple car maintenance task you can do at home. This guide walks you through how do you remove a wraparound light cover step by step, covering tools, techniques, and common pitfalls. Whether it is a headlight or taillight, you will have the cover off in minutes with the right approach.
Have you ever stood in front of your car staring at a cracked or foggy wraparound light cover? Maybe the bulb burned out and you need access. Or maybe you just want to clean it up. Whatever the reason, how do you remove a wraparound light cover is a question many car owners face. The good news is that it is not as hard as it looks. With the right approach, you can pop that cover off in under ten minutes.
This guide breaks down the entire process in plain, simple language. You will learn about the different types of covers, the tools you need, and the exact steps to follow. We also cover common mistakes so you do not damage your vehicle. By the end, you will feel confident tackling this job yourself.
Let us get into it. No jargon, no fluff, just practical advice that works.
Key Takeaways
- Know Your Cover Type: Different wraparound light covers use clips, screws, or twist-lock mechanisms.
- Gather Tools First: A screwdriver, pliers, and a soft cloth are all you need for most removals.
- Work Gently: Applying too much force is the number one mistake people make.
- Label Everything: Mark wires and clips before removal to make reinstallation easy.
- Clean as You Go: Use the removal opportunity to clean the housing and cover.
- Reinstall Carefully: Proper alignment prevents moisture leaks and loose covers.
- Call a Pro When Needed: Some modern vehicles have complex assemblies that need expert handling.
📑 Table of Contents
Understanding Your Wraparound Light Cover
Before you grab any tools, it helps to know what you are working with. Wraparound light covers come in different shapes and designs depending on your vehicle. Understanding the type of cover you have makes the removal process much easier.
What Is a Wraparound Light Cover?
A wraparound light cover is the outer shell that protects the light assembly on your car. It wraps around the headlight, taillight, or turn signal housing. These covers serve two main purposes. They protect the bulb and wiring from dirt, water, and debris. They also shape the light beam for proper visibility.
In older vehicles, wraparound light covers are often large and curved. They extend from one side of the headlight to the other. In newer cars, the design may be more compact but still follows the wraparound style. The removal method varies based on how the cover is attached.
Common Attachment Methods
Most wraparound light covers use one of three attachment methods. Knowing which one your car uses helps you choose the right removal technique.
- Clip-On Covers: These snap into place with plastic or metal clips. You gently pry them out to release.
- Screw-Fastened Covers: These use small screws around the edges. You need a screwdriver to remove them.
- Twist-Lock Covers: These turn to unlock. You rotate the cover counterclockwise to release it.
Some vehicles use a combination of these methods. For example, a cover might have two clips and one screw. Always check your owner’s manual before starting. It will tell you exactly how your light cover is secured.
Tools You Will Need
One of the best things about removing a wraparound light cover is that you do not need fancy equipment. Most of the time, you already have everything at home.
Essential Tools
- Flathead screwdriver: For prying clips and removing screws.
- Phillips head screwdriver: For screw-fastened covers.
- Soft cloth or towel: To place under the cover and prevent scratches.
- Needle-nose pliers: For stubborn clips or small parts.
- Pen or marker: To label wires and clips before removal.
Nice-to-Have Extras
- Rubber gloves: They give you a better grip on smooth covers.
- Flashlight: Helpful for seeing inside tight spaces.
- Cleaning solution: If you plan to clean the cover while it is off.
- Replacement bulb: Have it ready if you are changing a bulb at the same time.
Lay all your tools out on a clean surface before you start. This small prep step saves you from stopping midway through the job.
Step-by-Step Removal Process
Now for the part you have been waiting for. Here is exactly how to remove a wraparound light cover, step by step. Follow these instructions carefully and you will have great results.
Step 1: Turn Off the Engine and Let It Cool
Never attempt to remove a light cover while the engine is running or the lights are on. Wait at least ten minutes after turning off the car. The bulb and housing can get very hot. Letting them cool prevents burns and protects the delicate components inside.
Step 2: Open the Hood or Trunk
Depending on which light you are working on, open the hood or the trunk. For headlights, pop the hood and secure it with the prop rod. For taillights, open the trunk and locate the interior access panel behind the light assembly.
Many wraparound light covers can be removed from the inside of the car. This gives you better access and more leverage. Check both the front and back of the light assembly to find the best approach.
Step 3: Locate the Attachment Points
Look closely at the edges of the wraparound light cover. You need to find where it is attached. Run your fingers along the perimeter to feel for clips, screws, or seams.
Use your pen or marker to note the locations of each attachment point. This makes reinstallation much easier. Some people skip this step and then struggle to put the cover back on. Do not make that mistake.
Step 4: Remove the Screws or Release the Clips
Start with any screws first. Turn them counterclockwise with the appropriate screwdriver. Place the screws in a small bowl so they do not get lost.
For clip-on covers, gently insert a flathead screwdriver between the cover and the housing. Work around the edges slowly. You will hear small pops as each clip releases. Never use excessive force. If a clip feels stuck, try pressing on it from the back side with your pliers.
For twist-lock covers, grip the edges firmly and rotate counterclockwise. Apply steady pressure. Do not jerk or twist too aggressively.
Step 5: Disconnect Any Wiring
Before pulling the cover free, check for any wires connected to it. Some wraparound light covers have wiring harnesses attached. There is usually a small clip or tab that holds the connector in place.
Press the tab and gently pull the connector apart. Do not yank on the wires. Use the connector housing itself to separate the pieces. If it feels stuck, wiggle it gently side to side until it releases.
Step 6: Lift the Cover Off
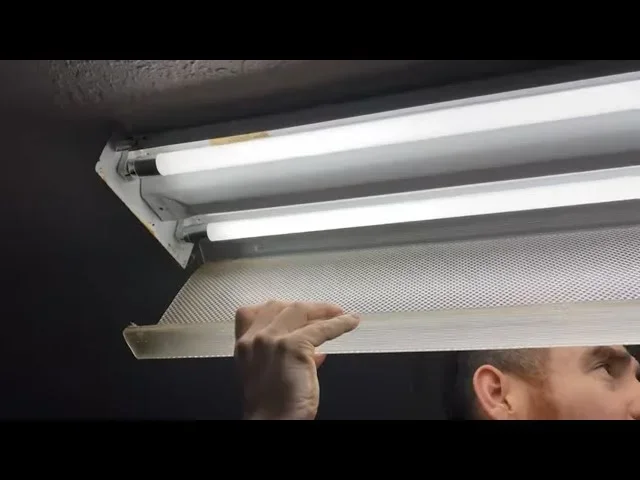
Once all screws, clips, and wires are free, the cover should come off easily. Place your soft cloth underneath to catch any small parts. Lift the cover straight up and away from the housing.
Set the cover on a clean, flat surface. Inspect it for cracks, discoloration, or damage. This is also a great time to clean the inside of the housing with a dry cloth.
Common Challenges and How to Overcome Them
Sometimes removing a wraparound light cover does not go as smoothly as planned. Here are the most common challenges and how to handle them.
Stuck Clips
Plastic clips can become brittle over time, especially in cold weather. If a clip refuses to release, do not force it. Spray a small amount of silicone lubricant around the clip base. Wait a minute or two and try again. The lubricant reduces friction and helps the clip slide free.
Another trick is to use a plastic pry tool instead of a metal screwdriver. Plastic tools are less likely to crack or scratch the cover or housing.
Rusty or Seized Screws
Screws near the wheel well or bumper are exposed to road salt and moisture. They can rust and seize over time. Apply a penetrating oil like WD-40 to the screw head. Wait five minutes and try again. If the screw head is stripped, use a screw extractor kit to remove it safely.
Broken Clips
If a clip breaks during removal, do not panic. You can still complete the job. Remove the remaining clips and carefully pull the cover away. For reinstallation, you can buy replacement clips at any auto parts store for just a few dollars.
Tight Spaces
Some vehicles have tight engine bays that make it hard to reach the light cover. Use a flexible flashlight to improve visibility. A ratchet extension can also help you reach screws in tight spots.
Tips for Reinstalling the Cover
Removing the cover is only half the job. Putting it back on correctly matters just as much. A poorly reinstalled cover can lead to moisture leaks, rattling noises, and poor light performance.
Align the Clips and Screws First
Before securing anything, hold the cover in place and make sure all clips and screw holes line up. If something does not fit, do not force it. Check for debris or misalignment and fix it first.
Reconnect Wiring Carefully
Push the wiring connector back in until you hear a click. Test the connection by gently tugging on it. It should feel firm and secure. A loose connection can cause flickering lights or warning lights on your dashboard.
Tighten Screws Evenly
Do not tighten one screw all the way before doing the others. This can warp the cover and create gaps. Instead, tighten all screws finger-tight first. Then go back and snug each one evenly. Stop as soon as the cover feels secure. Over-tightening can crack plastic covers.
Test the Lights
Once the cover is back on, turn on the car and test all the lights. Check the headlights, taillights, and turn signals. Make sure everything works properly. If a light does not come on, double-check the bulb and wiring before removing the cover again.
When to Call a Professional
Most people can remove a wraparound light cover without any help. However, there are situations where it is best to call a professional.
If your vehicle has a complex light assembly with many electronic components, professional help is a good idea. Some modern cars have LED arrays and sensors built into the light housing. Removing the cover incorrectly can damage these sensitive parts. A mechanic or auto electrician knows how to handle these systems safely.
Also call a professional if you notice significant corrosion inside the light housing. Rust and moisture damage can affect the wiring and bulb socket. A professional can assess the damage and make any necessary repairs while the cover is off.
Finally, if you feel uncomfortable at any point during the process, it is okay to stop. There is no shame in asking for help. Your safety and your vehicle’s condition matter more than saving a few dollars on a DIY job.
Maintenance Tips for Your Wraparound Light Cover
Once you have successfully removed and reinstalled your wraparound light cover, keep it in great shape with regular maintenance. A little care goes a long way toward extending the life of your light cover and keeping your vehicle looking its best.
Clean the cover every few weeks with a mild soap and water solution. This removes road grime, bug splatter, and UV buildup that can cause fading and cloudiness over time. Avoid using harsh chemical cleaners. They can damage the plastic and make the cover brittle.
Inspect the clips and screws every few months. Tighten any loose screws and replace any cracked clips right away. A small problem today can become a big problem tomorrow. Catching issues early keeps your light cover secure and your vehicle safe.
Apply a UV protectant spray to the cover once or twice a year. This helps prevent sun damage and keeps the cover clear and shiny. It is a simple step that makes a big difference in the long run.
Key Takeaways
- Know Your Cover Type: Different wraparound light covers use clips, screws, or twist-lock mechanisms.
- Gather Tools First: A screwdriver, pliers, and a soft cloth are all you need for most removals.
- Work Gently: Applying too much force is the number one mistake people make.
- Label Everything: Mark wires and clips before removal to make reinstallation easy.
- Clean as You Go: Use the removal opportunity to clean the housing and cover.
- Reinstall Carefully: Proper alignment prevents moisture leaks and loose covers.
- Call a Pro When Needed: Some modern vehicles have complex assemblies that need expert handling.
FAQ
Can I remove a wraparound light cover without any tools?
In some cases, yes. Clip-on covers can often be removed by hand using gentle pressure. However, having a screwdriver and pliers on hand makes the job easier and faster. It is always best to be prepared before you start.
How long does it take to remove a wraparound light cover?
For most vehicles, the process takes between five and fifteen minutes. The exact time depends on the type of cover, the number of attachment points, and your experience level. First-timers might take a little longer, and that is perfectly fine.
Is it safe to drive with a removed light cover?
It is not recommended. The light cover protects the bulb and wiring from moisture and debris. Driving without it can lead to water damage, broken bulbs, and reduced visibility. Always reinstall the cover as soon as you finish your work.
What should I do if a clip breaks during removal?
Do not try to force the remaining parts off. Remove the broken clip carefully and finish the removal with the remaining clips. Replace the broken clip with a new one before reinstalling. Replacement clips are inexpensive and easy to find at auto parts stores.
Can I clean the light cover while it is off?
Absolutely. In fact, removing the cover gives you the perfect opportunity to clean it thoroughly. Use a mild soap solution and a soft cloth. For stubborn haze, a specialized headlight restoration kit works well. Let the cover dry completely before reinstalling it.
Will removing the light cover void my vehicle warranty?
In most cases, no. Removing a light cover for maintenance or bulb replacement is considered normal vehicle care. However, if the removal causes damage to the housing or wiring, it could affect your warranty. Always follow the proper procedure and be gentle during the process.
Conclusion
So, how do you remove a wraparound light cover? The answer is simpler than most people think. With the right tools, a little patience, and the steps laid out in this guide, anyone can do it. You do not need to be a mechanic or a car expert. You just need to take your time and follow the process.
Start by understanding your cover type. Gather your tools. Then work through each step carefully. If you hit a challenge, refer back to the troubleshooting tips. And always remember to reinstall the cover properly when you are done.
Removing a wraparound light cover is one of those small car maintenance tasks that saves you time and money. It also gives you a better understanding of your vehicle. The more you do it, the easier it gets. So grab your screwdriver, pop that hood, and give it a try. You will be glad you did.